Seamless Showcase: Deploying my Portfolio on AWS Amplify
A while ago I decided to start using AWS amplify and I created my portfolio site on Hugo on local machine but have not deployed yet. So, I decided to deploy it on AWS Amplify.
Since to deploy application on AWS Amplify to have our code ready to be deployed in a supported repository.
- Supported repositories: GitHub, Bitbucket, GitLab and AWS CodeCommit. In my case, I have my portfolio site code on Github Repo. So, I pushed my local code to the git repo on
masterbranch. - Another option is to deploy manually with drag and drop, Amazon S3 or any URL.
Pre-requisites:
- Sign up for an AWS Account. There are no upfront charges or any term commitments to create an AWS account and signing up gives you immediate access to the AWS Free Tier.
- Create a GitHub Account or another code repository like GitLab or BitBucket or AWS CodeCommit.
- Have Git installed on your local machine.
Lets Get Started…
In AWS Console, enter to AWS Amplify service and choose Amplify Hosting
If you don’t have an Amplify app, this screen appears and you have to click on Get Started

and then choose Amplify Hosting

b) If you already have an Amplify resource click on New app and Host web app

Configure Amplify Hosting:
The first step to setting up Amplify Hosting is to connect your repository. In my case, I chose GitHub and I gave the permission to my site repo only


Add repository branch:
choose your repository and your branch

Configure build settings:
So, on the build settings I have added following build commands:
version: 1
frontend:
  phases:
    # IMPORTANT - Please verify your build commands
    build:
      commands: ['hugo']
  artifacts:
    # IMPORTANT - Please verify your build output directory
    baseDirectory: "./public"
    files:
      - '**/*'
  cache:
    paths: []

Advanced settings are optional. This allows you to reference your build image, add environment variables and override default installed packages.
Review the configuration and click Save and deploy

Now Amplify must be provisioned, built, deployed and verified
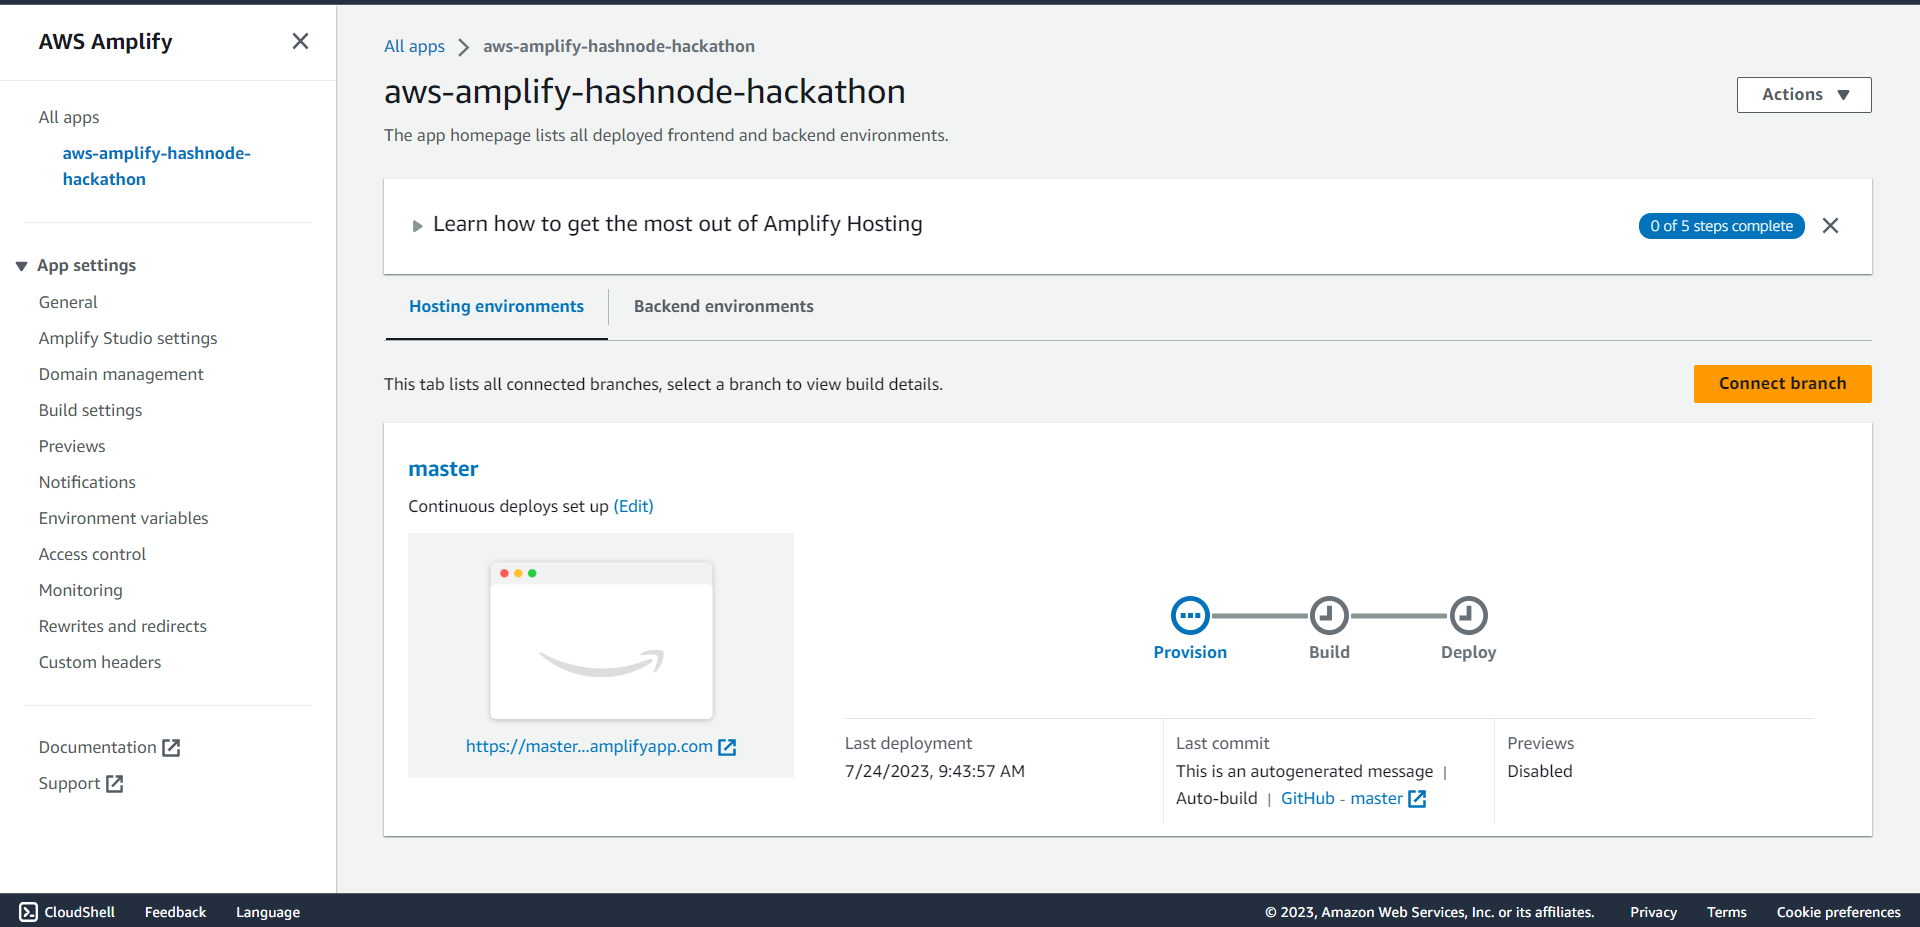
And wait few minutes for deployment.
When finished, you will be able to access the new URL generated by Amplify
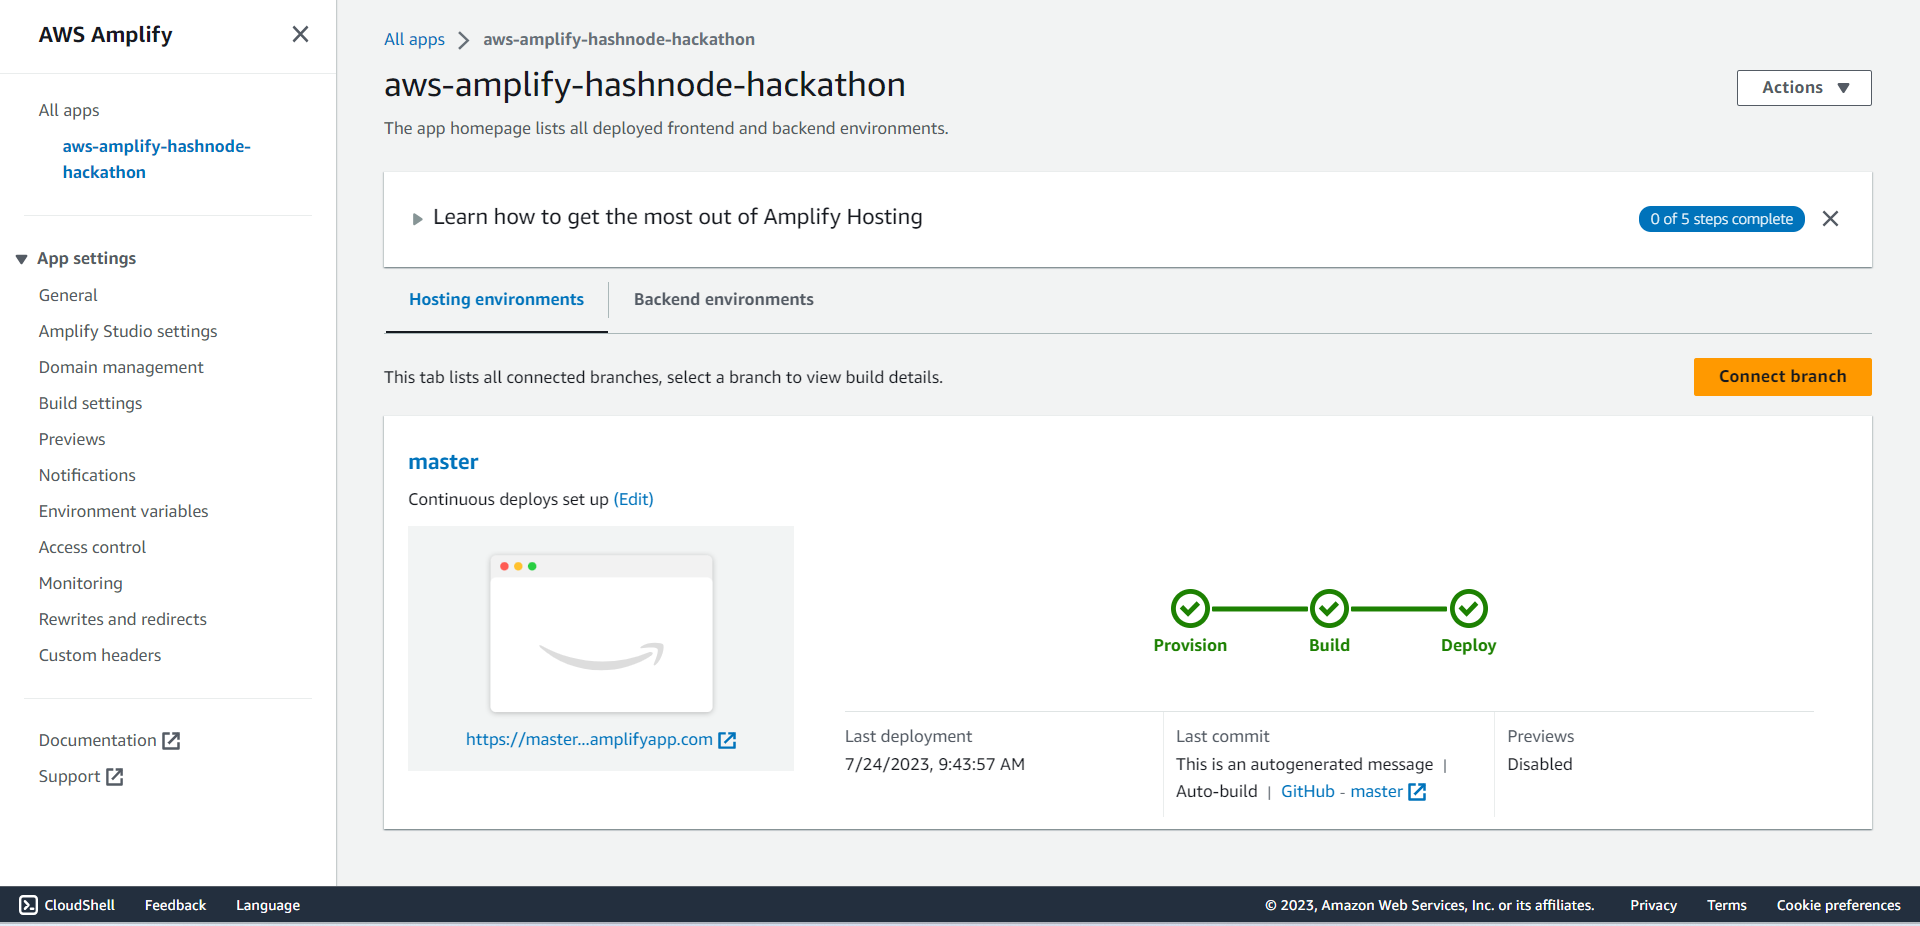

Additional configuration
In the following lines, we will review how to apply additional configuration to add more value to our website.
How to associate my web with my domain name
We can also set up our Domain Name to our deployed website with Amplify Hosting easily.
To register the domain name I used Cloudflare.
AWS Amplify will now deploy the Site for the first time to the master environment.
On initial deployment, you will be assigned a URL like https://master.d22j3pjdb1p4kd.amplifyapp.com/, but this can and should be changed in the Amplify console. In the main page above your app is a drop-down menu titled “Learn how to get the most our of Amplify Console”. This menu takes you to settings pages to set up custom domain names, free SSL certificates, add password protection, set up test versions of your site, and even enable pull-request reviews. If you already have a hosted zone in AWS Route53, it takes just a few clicks to assign a domain name. SSL takes just a few minutes more.
How to protect any environment
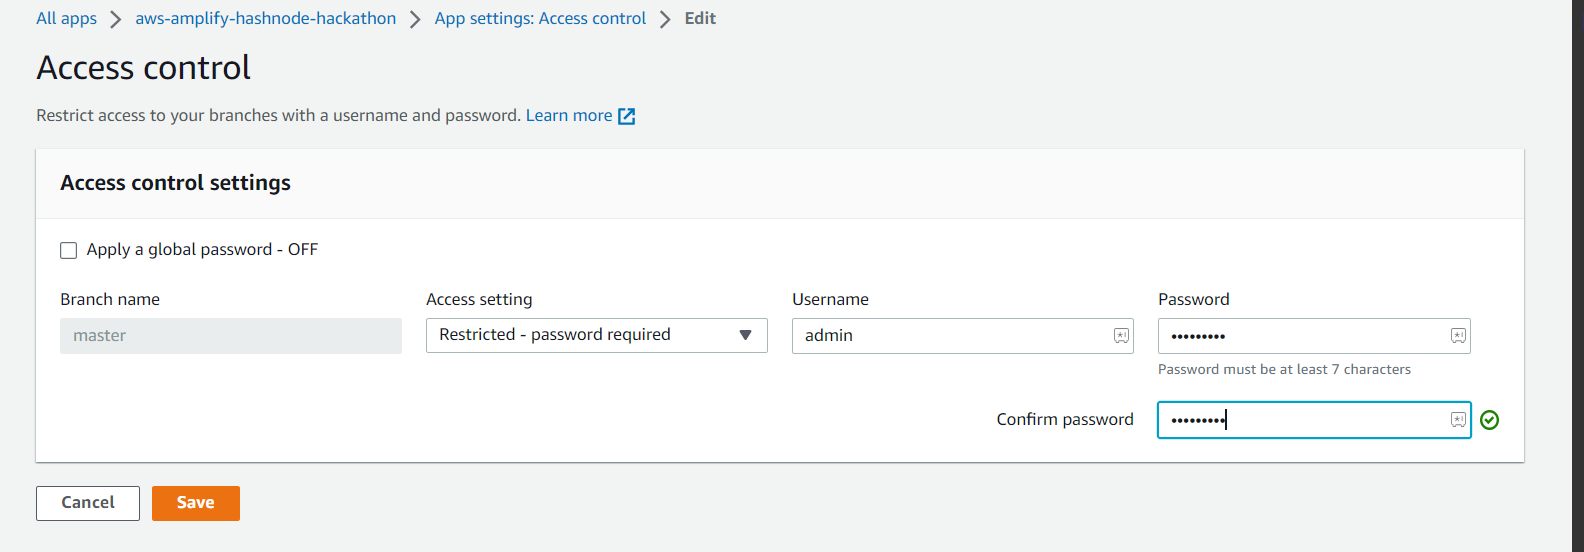
If you want to protect any environment to don’t be accessible by everyone, you can use the feature of Access Control. With this option, you can create a simple user/password to restrict access to your web:

There are only 2 options for the option Access settings:
- Publicly available
- Restricted - password required

When you try to access now to the web you have to log in yo view the content:
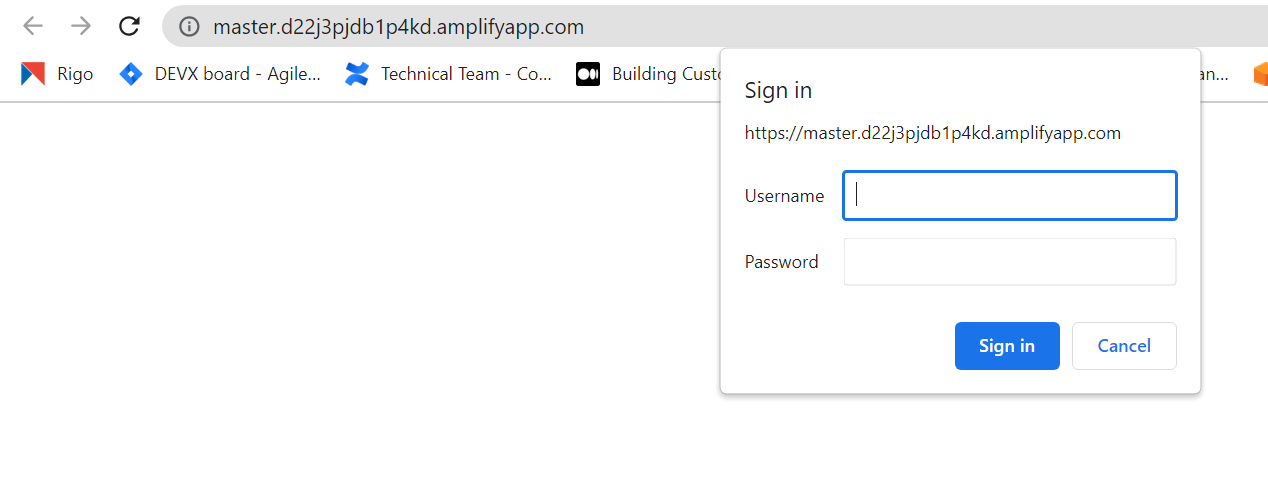
Adding Domain:
We can also set up our Domain Name to our deployed website with Amplify Hosting easily.
To register the domain name I used Cloudflare:
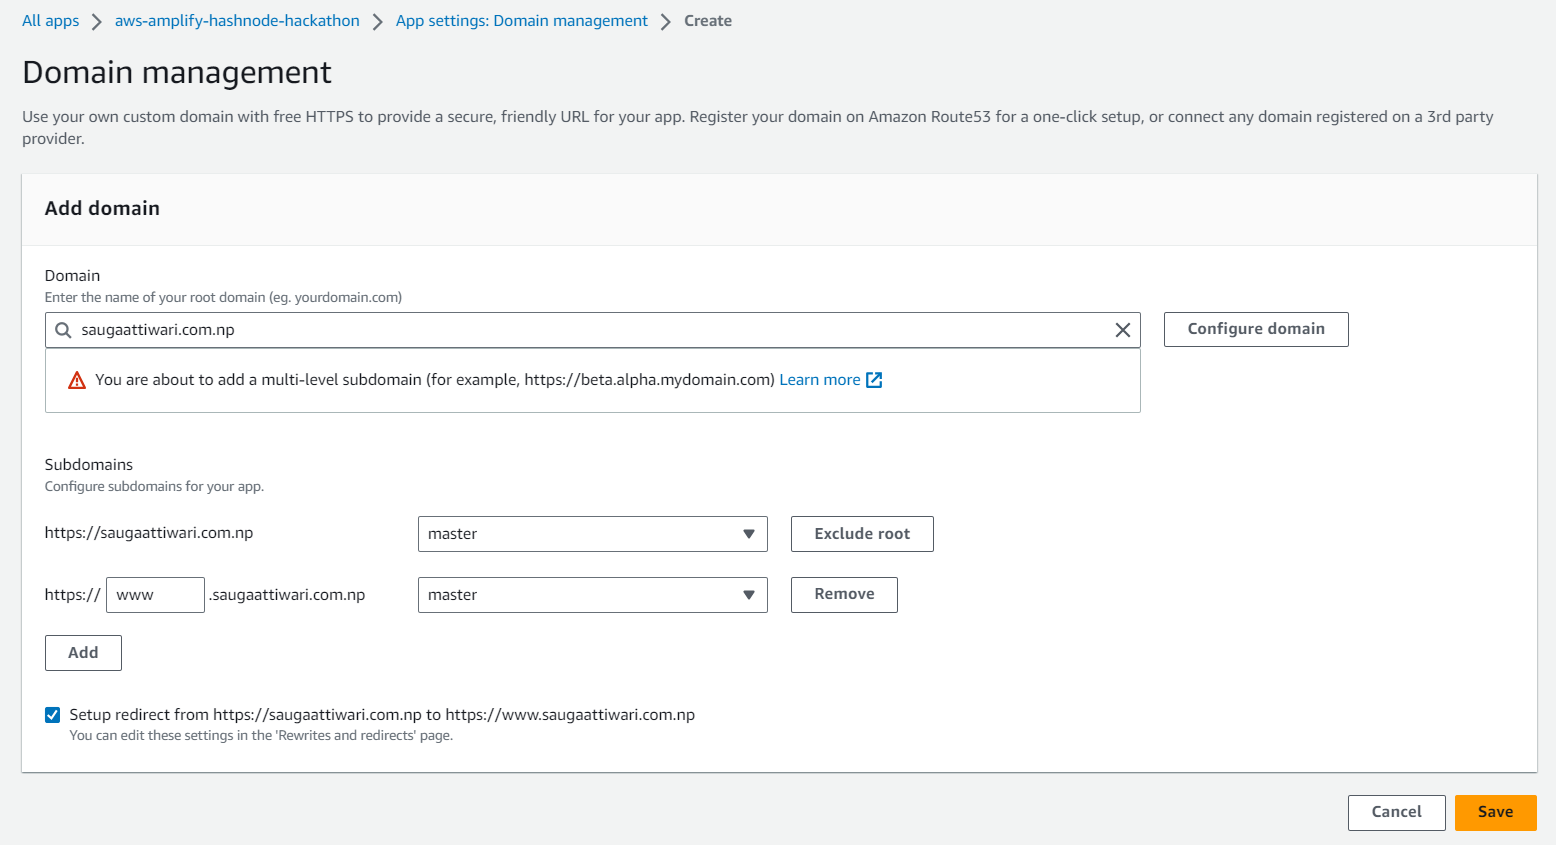
In the side menu, click Domain management, and then click Add domain.

Choose your Domain and click on Save. As I register my domain with Route53, it appears in the text field when I click on it.

Now you can choose the branch, the subdomains and check for automatic redirect from HTTP to HTTPS, and click Save.
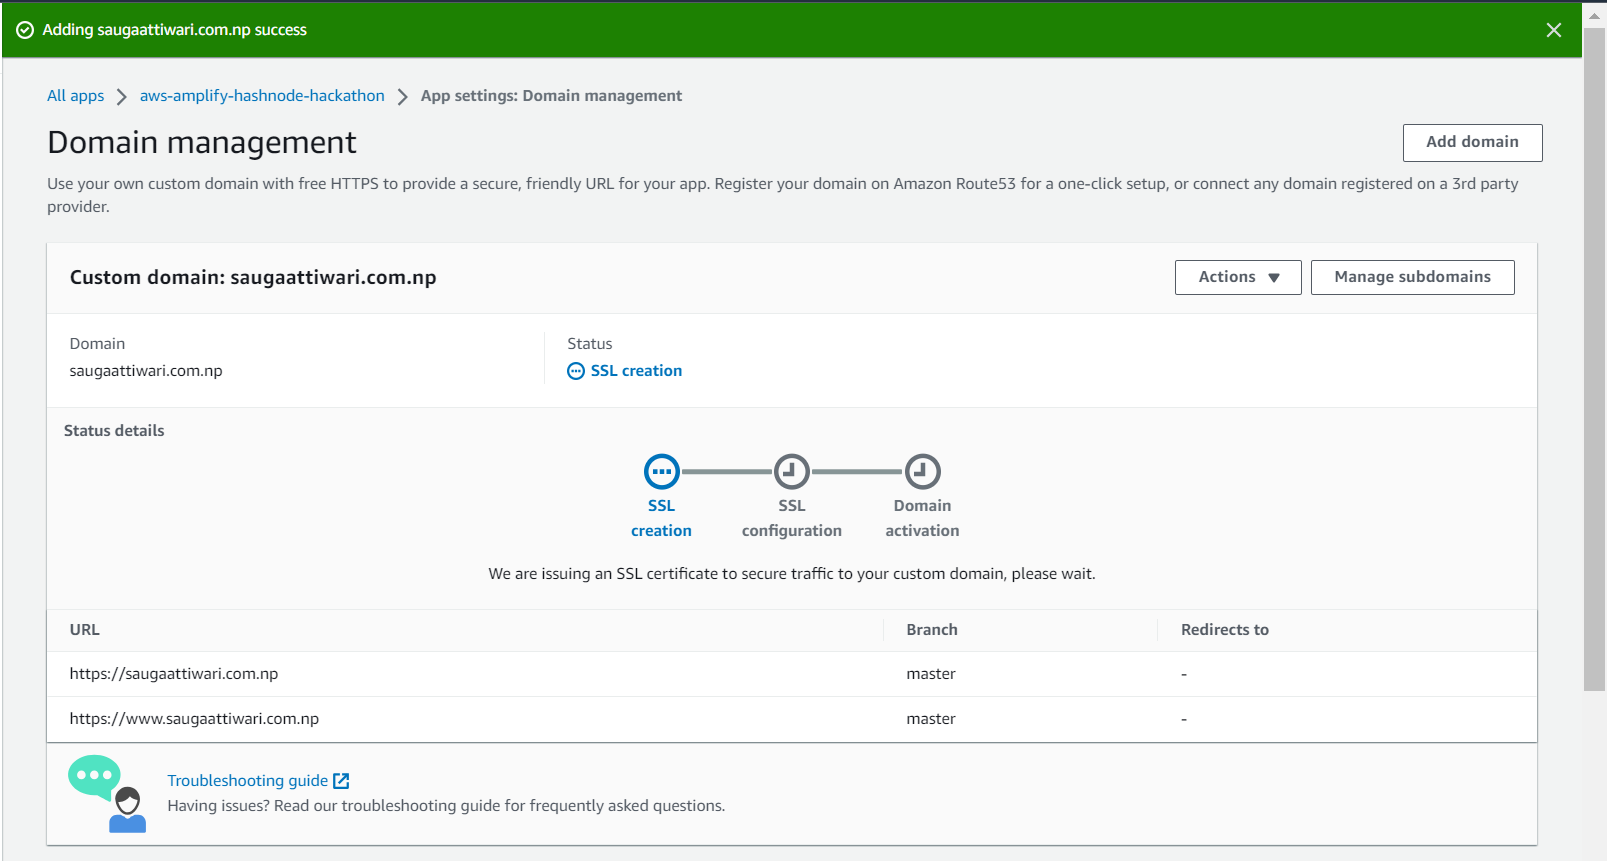
It may take several minutes to complete. First, you need to create the SSL certificate, then configure the SSL and finally activate it.
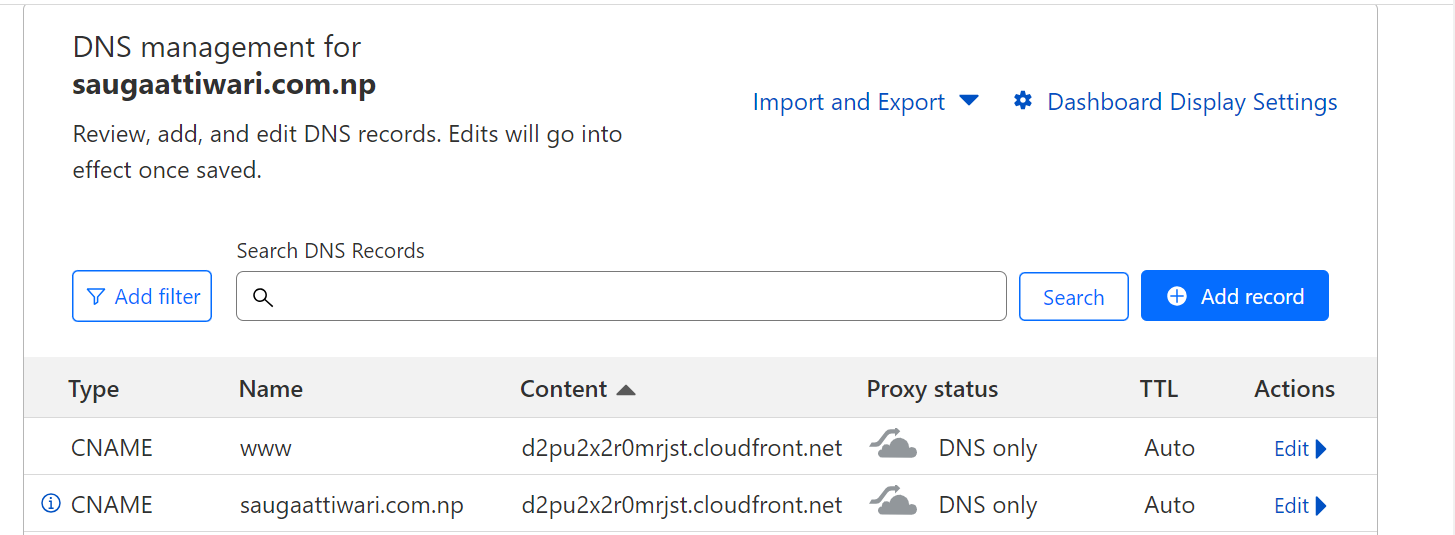
Add DNS records to Cloudflare ( In my case) or lets say in your Domain Management Center.
After adding records on your Domain management, your domain status on Amplify is Available.
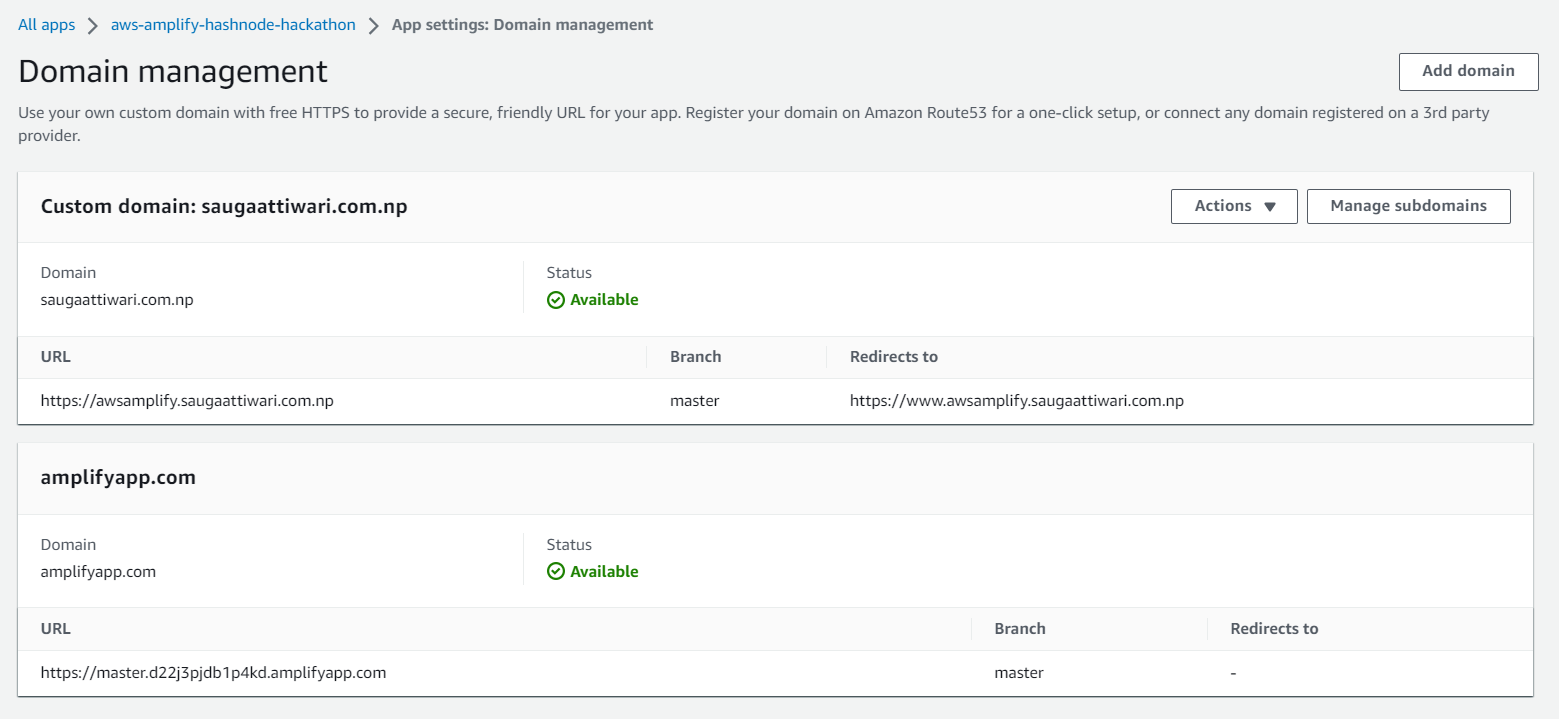
If we access the main page we can see that the URL has changed.
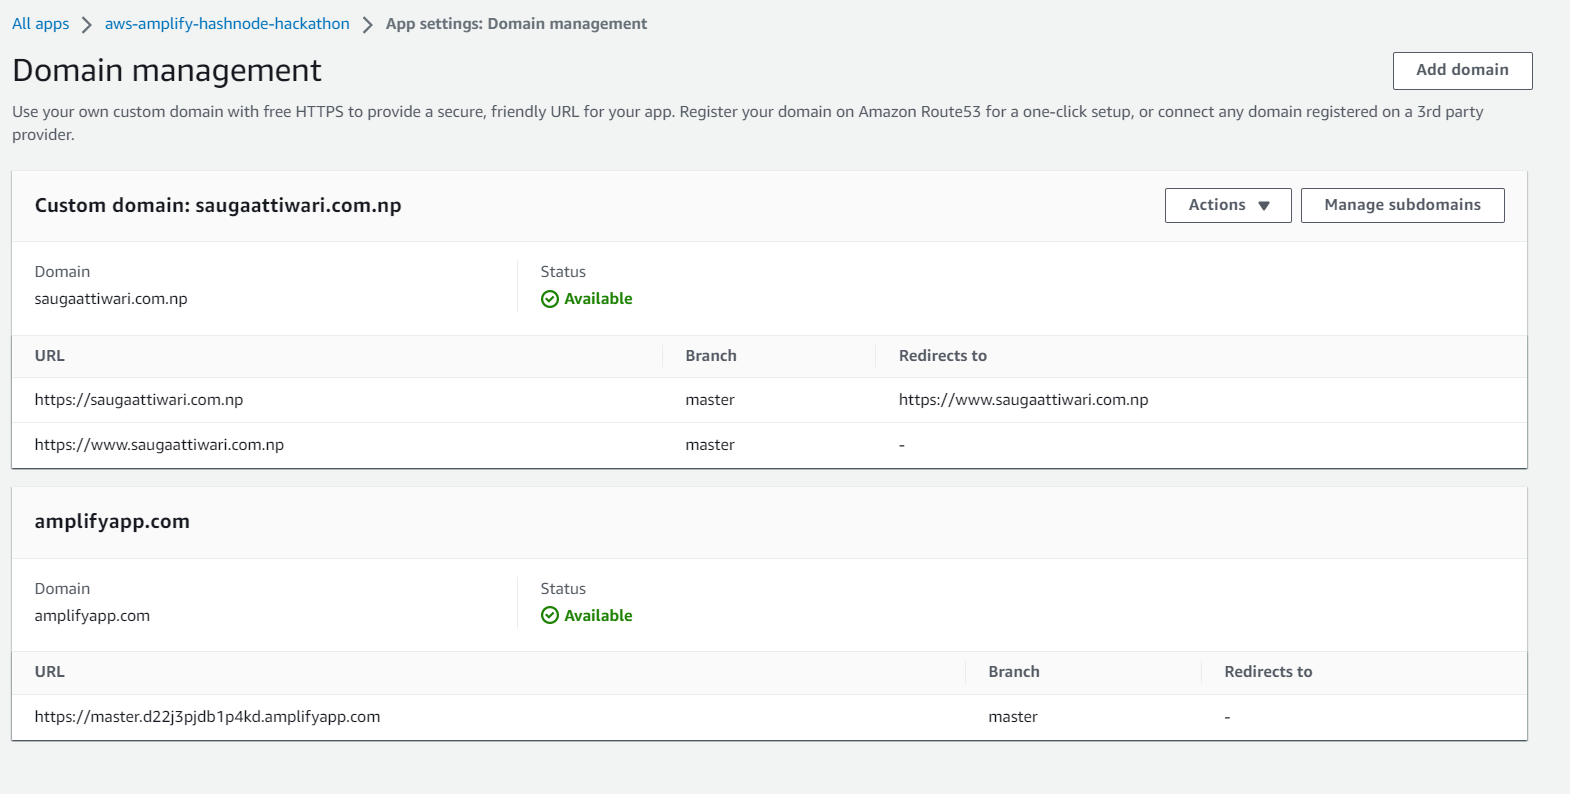
We can now access it with our domain name:

That’s it, quick and easy!
Conclusions:
Congratulations! You have successfully hosted your personal Hugo site on AWS Amplify. With AWS’s powerful infrastructure and Amplify’s ease of use, your static website will now enjoy better scalability, security, and performance. Remember to keep your Hugo site updated and continue exploring AWS Amplify’s features to enhance your web presence even further.
Now that your Hugo site is live, go ahead and share your valuable content with the world!
