Optimize Your Cloud Infrastructure Costs with Infracost
With the rise of cloud computing technology, businesses are increasingly relying on cloud providers to meet their IT infrastructure requirements. However, budgeting for these resources can be difficult. It can be difficult to understand your spending and identify cost-cutting opportunities when there are so many different services and pricing options available.
In this blog, we’ll take a closer look at Infracost, and how it can help you manage the costs of your cloud infrastructure more effectively.
Introduction
Infracost is a tool that assists you in monitoring and tracking the costs of your cloud infrastructure resources. Infracost works with a number of cloud providers, including AWS, Google Cloud, and Azure, and provides cost estimates for your infrastructure based on the resources you use.
Let’s get started:
To get started with Infracost, you need to do the following:
1. Install the Infracost CLI: Using the following command, you can install Infracost. Example: you can run the following command to install Infracost if you have brew installed:
brew install infracost

#verify the installation
infracost --version
2. Get API Key: Register for a free API key that the CLI can use to access our Cloud Pricing API and retrieve prices, such as prices for instance types.
The key can be retrieved with infracost configure get api_key.
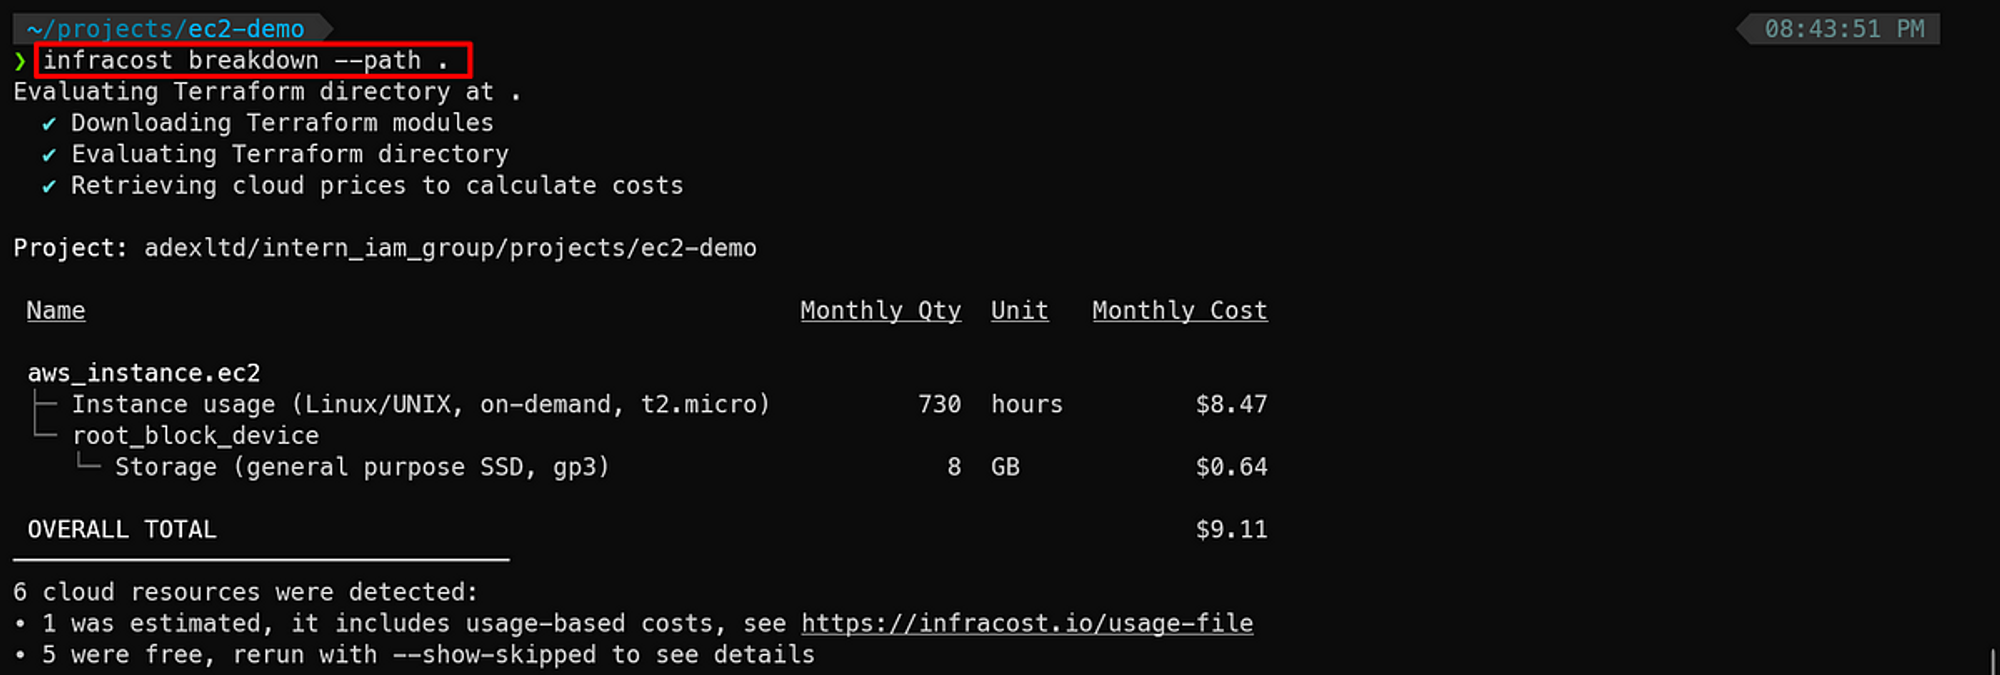
3. Show cost estimate breakdown:
Infracost parses the project locally to determine resource types and quantities needed to calculate costs. The [--path flag](https://www.infracost.io/docs/features/cli_commands/#breakdown) can point to a Terraform directory or plan JSON file.
cd <your_terraform_project_dir>
# Terraform variables can be set using --terraform-var-file or --terraform-var
infracost breakdown --path .
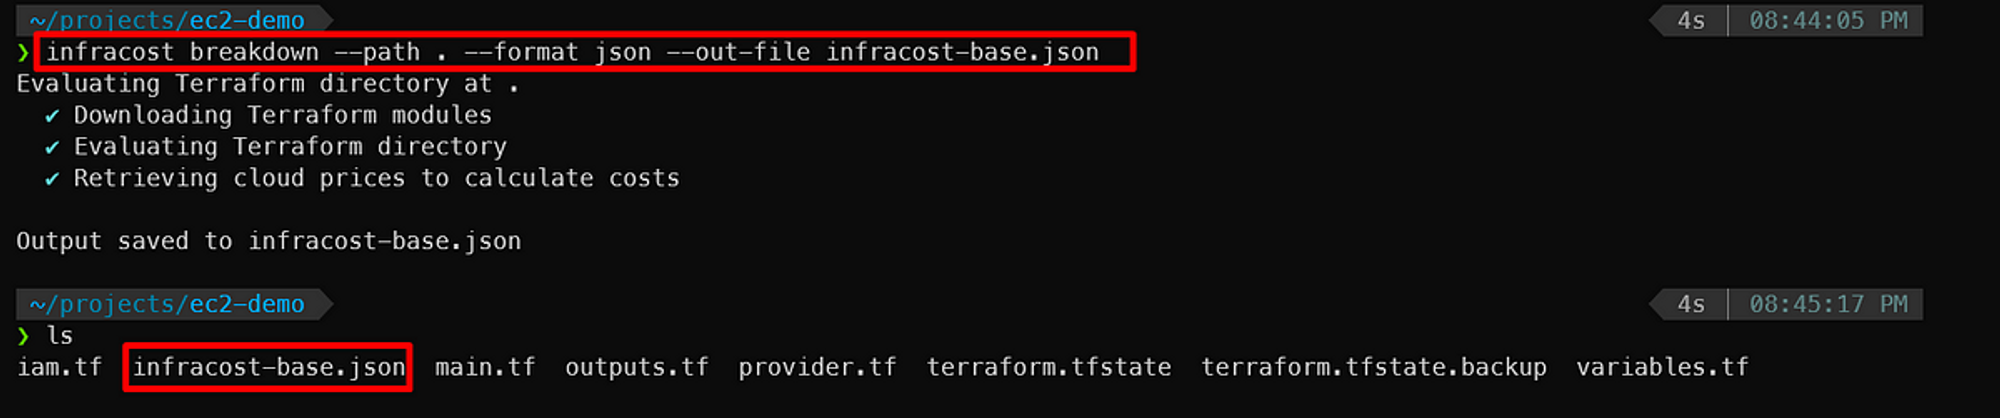
4. Visualize cost data: Infracost provides a dashboard where you can visualize and compare the cost of your infrastructure over time.
a. Generate an Infracost JSON file as the baseline:
infracost breakdown --path . --format json --out-file infracost-base.json
b. Edit your Terraform project and try changing your infra to compare the costs.
c. Generate a diff by comparing the latest code change with the baseline:
infracost diff --path . --compare-to infracost-base.json
 5. Cost in Infracost Dashboard:
The following command sends its JSON output to Infracost Cloud.
infracost upload --path infracost-base.json
Log in to Infracost Cloud > Repos page to see the cost estimate.
That’s it!!!👏
Congratulations!!👏 Using Infracost, you can easily see the costs of your infrastructure resources, identify areas where you may be overspending, and make informed decisions to optimize your costs. This can help you save money and ensure that you’re using your cloud resources effectively.
Conclusion:
In conclusion, Infracost is a powerful tool for managing the costs of your cloud infrastructure. Whether you’re new to cloud computing or have been using it for years, Infracost can help you optimize your costs and make the most of your cloud resources.