Setting Up a Well-architected Automated AWS Landing Zone
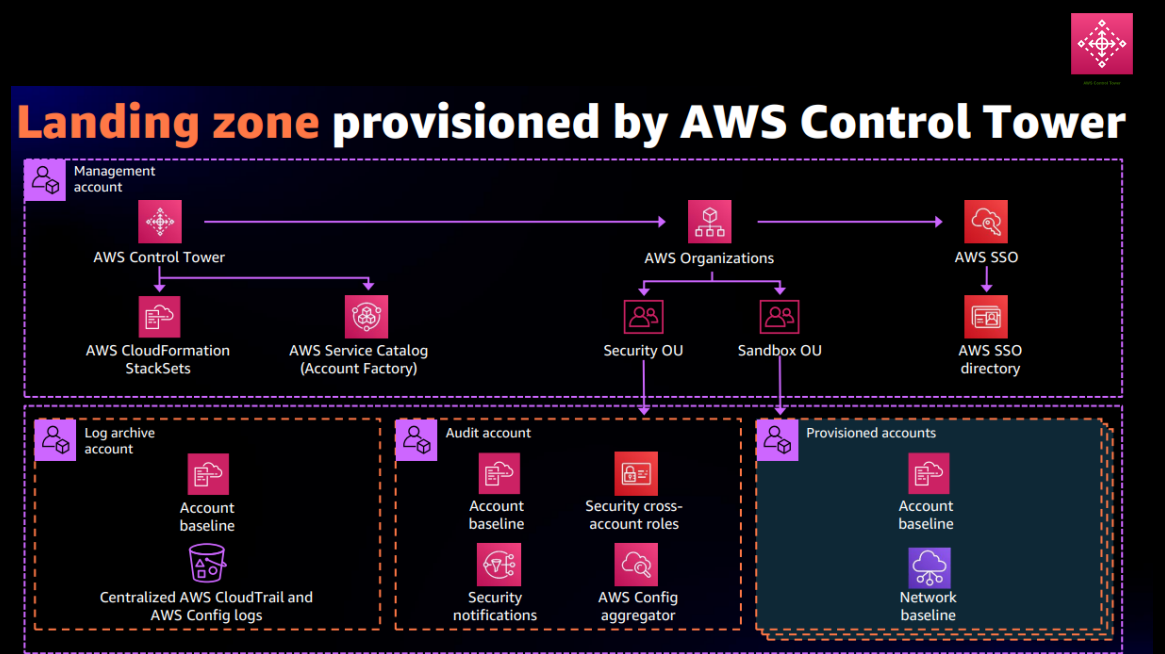
A landing zone is a well-architected, multi-account environment that’s based on AWS security and compliance best practices. AWS Control Tower automates the setup of a new landing zone using best-practices blueprints for identity, federated access, and account structure.
Problem Statement:
As we all know, an AWS account is the only logical boundary for permissions. An uncoupled account structure is necessary to achieve isolation of billing, resource limit, and authorization by limiting the blast radius. To tackle this situation of the accrescent number of workloads and clutter with increased complexity in managing and maintaining the environments, AWS came up with a solution known as Landing Zone (LZ).
In this blog post, I will walk you through the setting up well-architected automated Landing zone which can help save time by automating the set-up of an environment for running secure and scalable workloads while implementing an initial security baseline through the creation of core accounts and resources.
Prerequisite:
- AWS Root Account.
- Create your shared account email addresses: this email requires for
log archiveandauditaccount.
Steps:
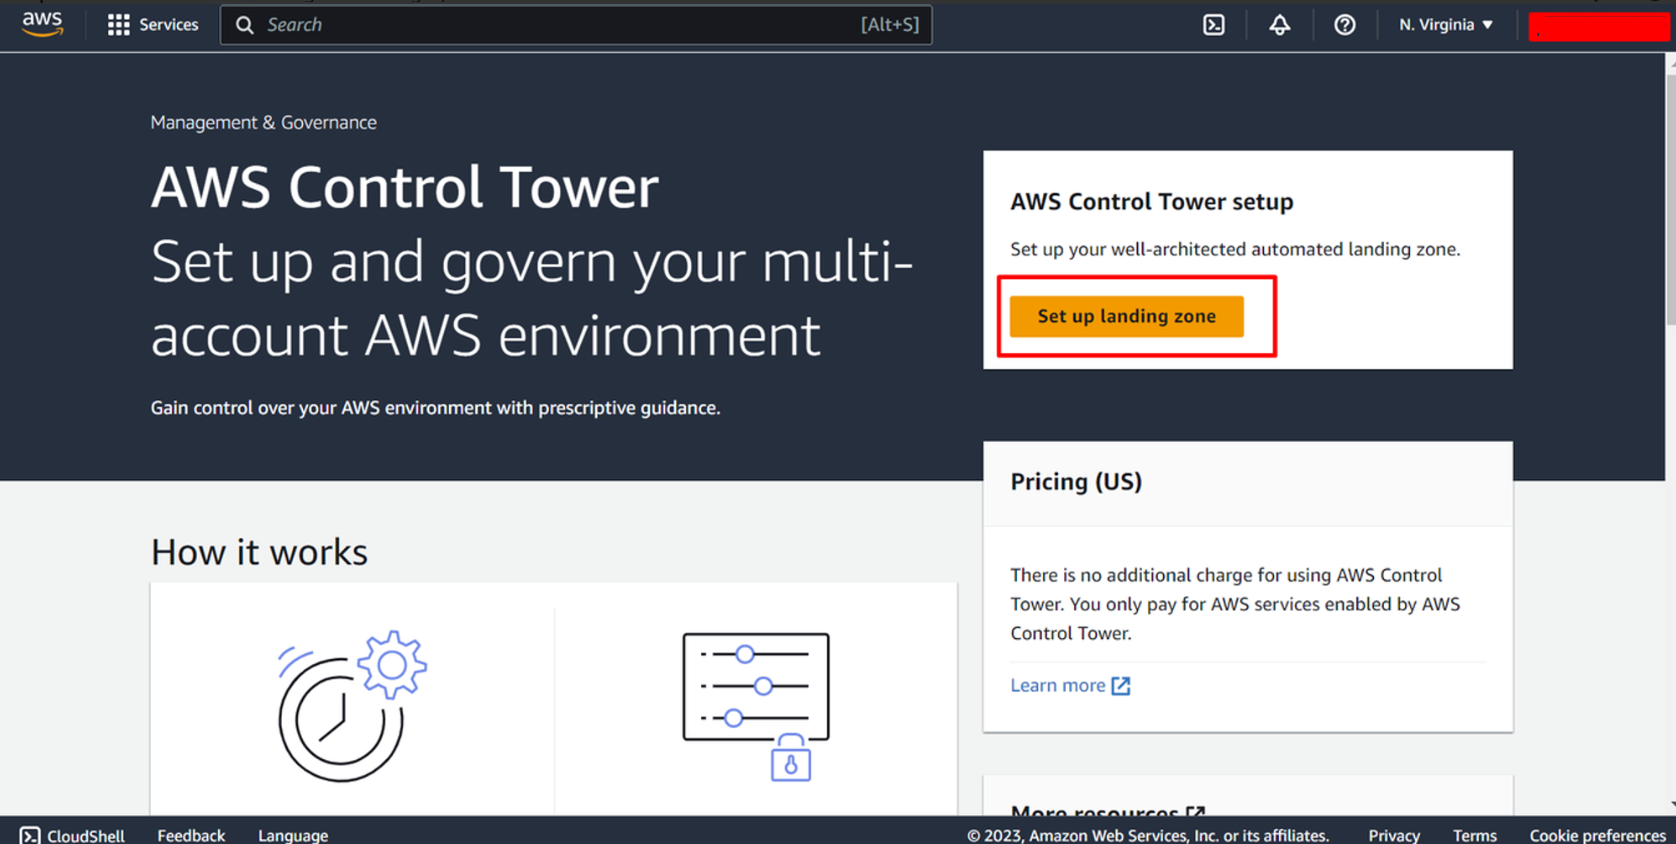
Lets start by clicking on Set up landing zone
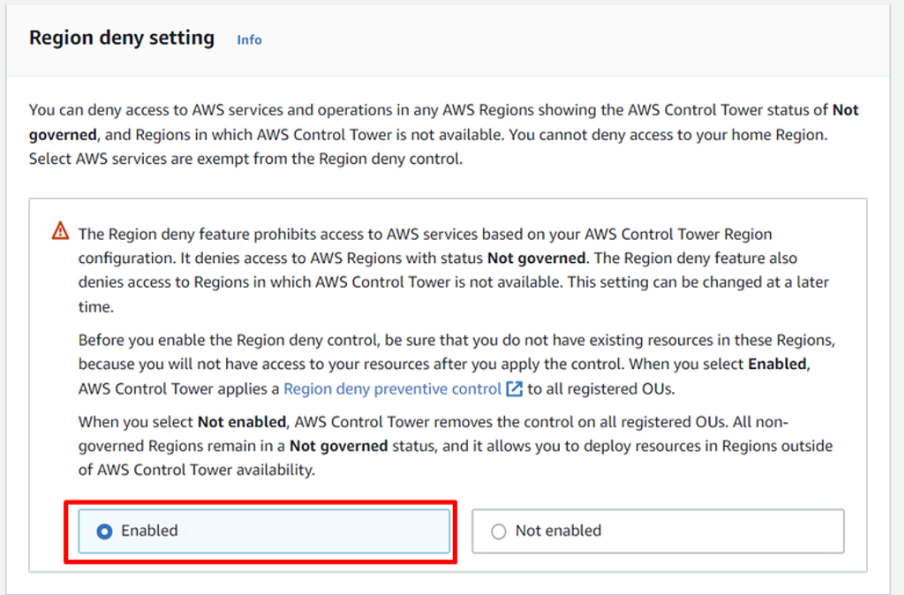
Review pricing and select Region
- Select Home region for your AWS Control Tower from the dropdown.
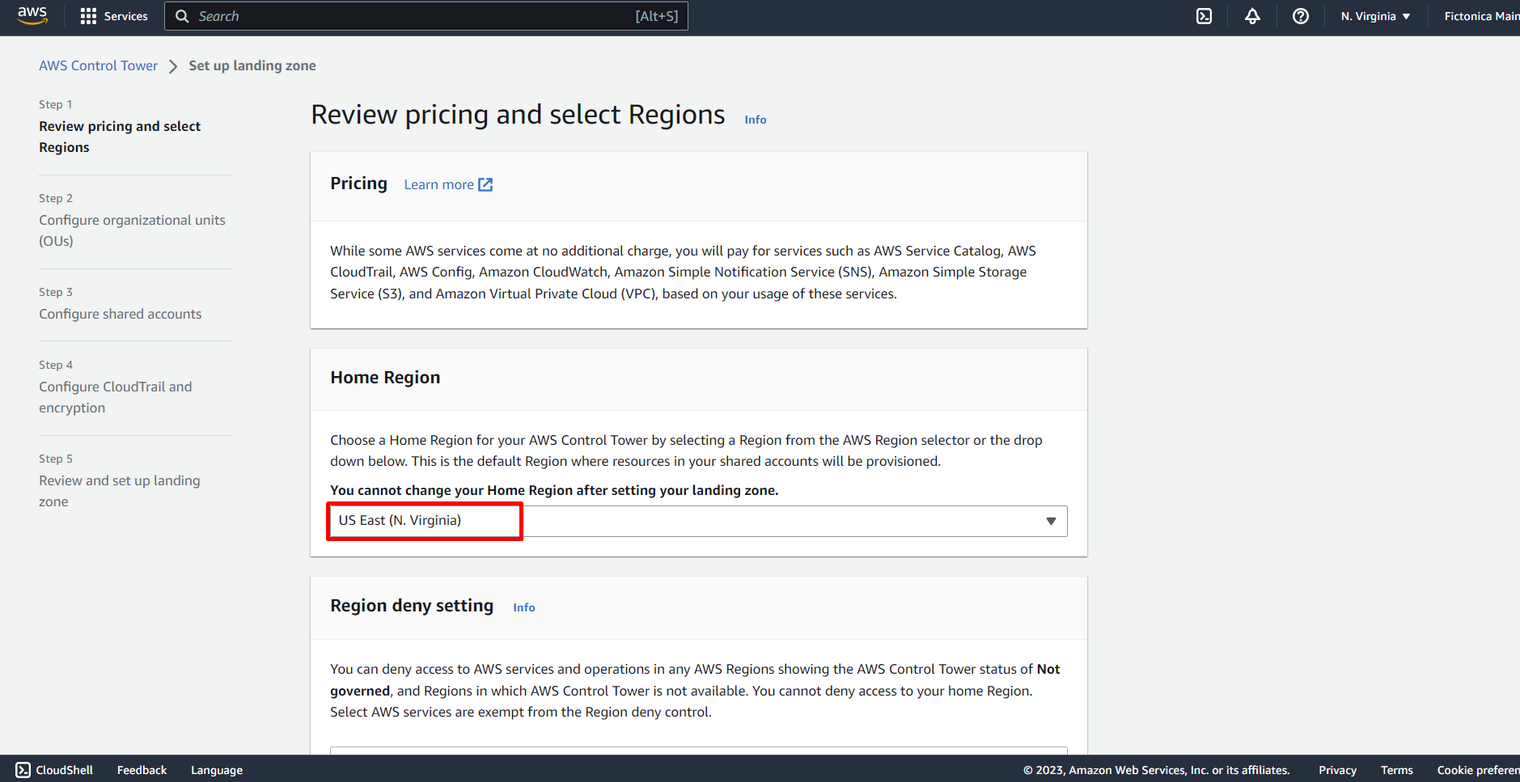
- Select
Enabled for Region Deny setting.
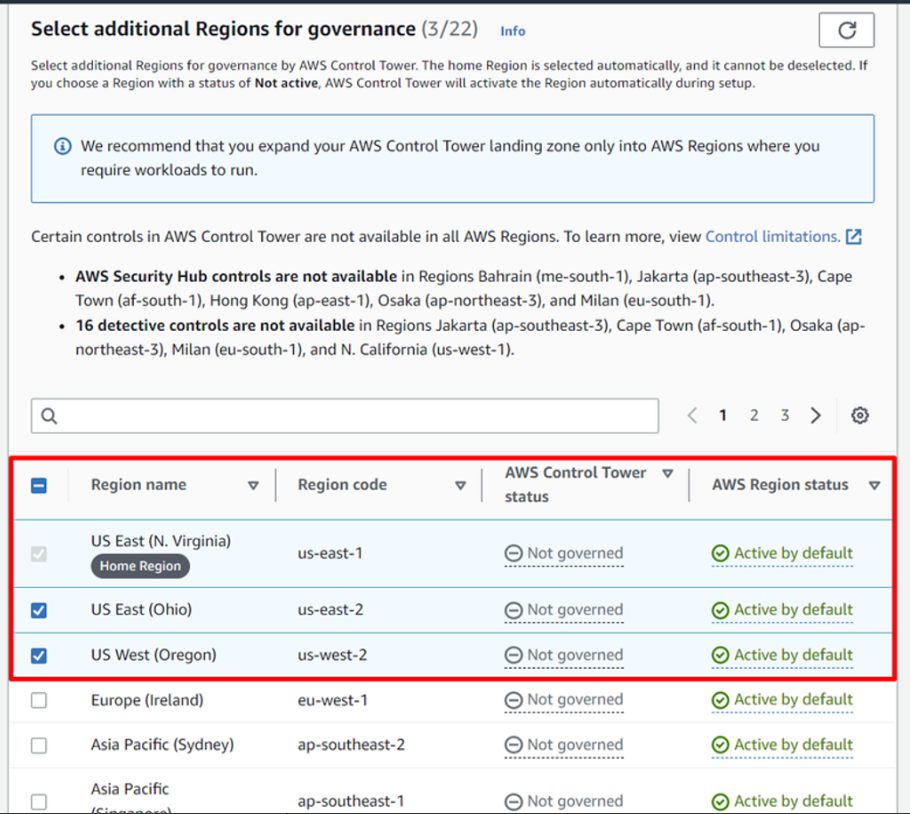
3. Additional AWS Regions for governance (Optional):
You can select the multiple regions to govern in addition to the home Region. Typically, you’ll select regions in which you plan to run workloads. You can add governance to regions after setup. Click Next to proceed.
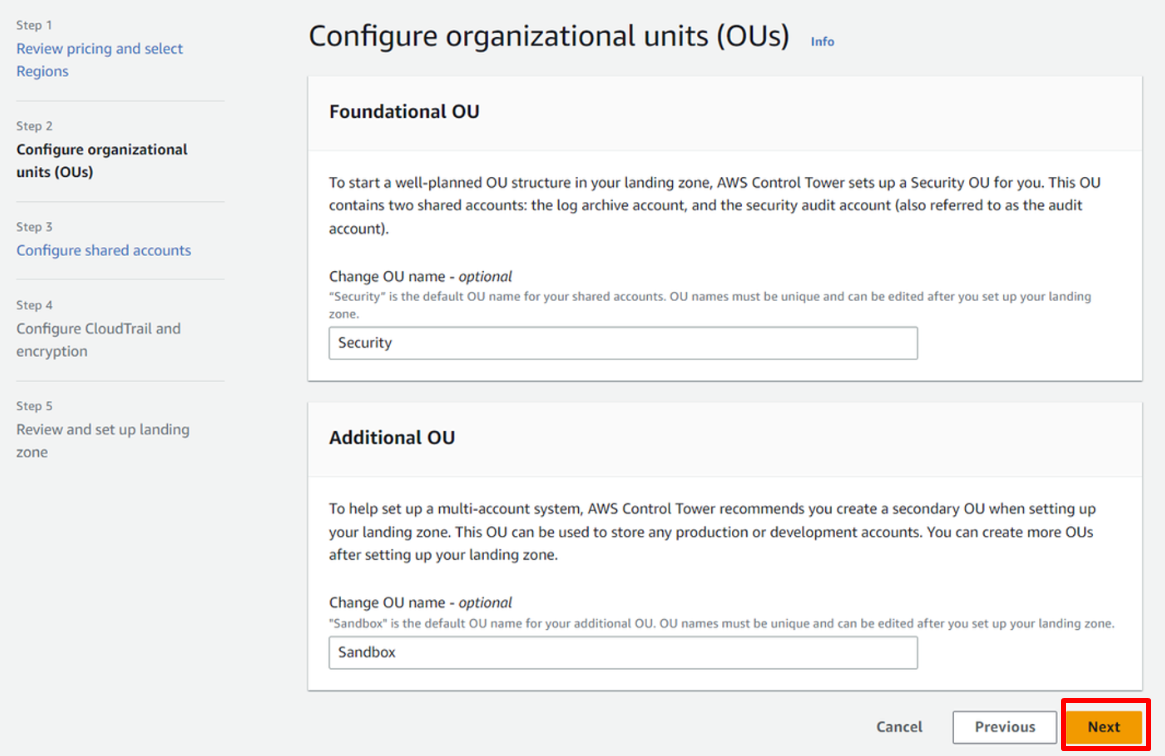
Configure organizational units (OUs)
Change of OU name is optional in
Foundational OU.Securityis the default OU name in this example.Change of OU name is optional in
Additional OU.Sandboxis the default OU name in this example. ClickNextto proceed.
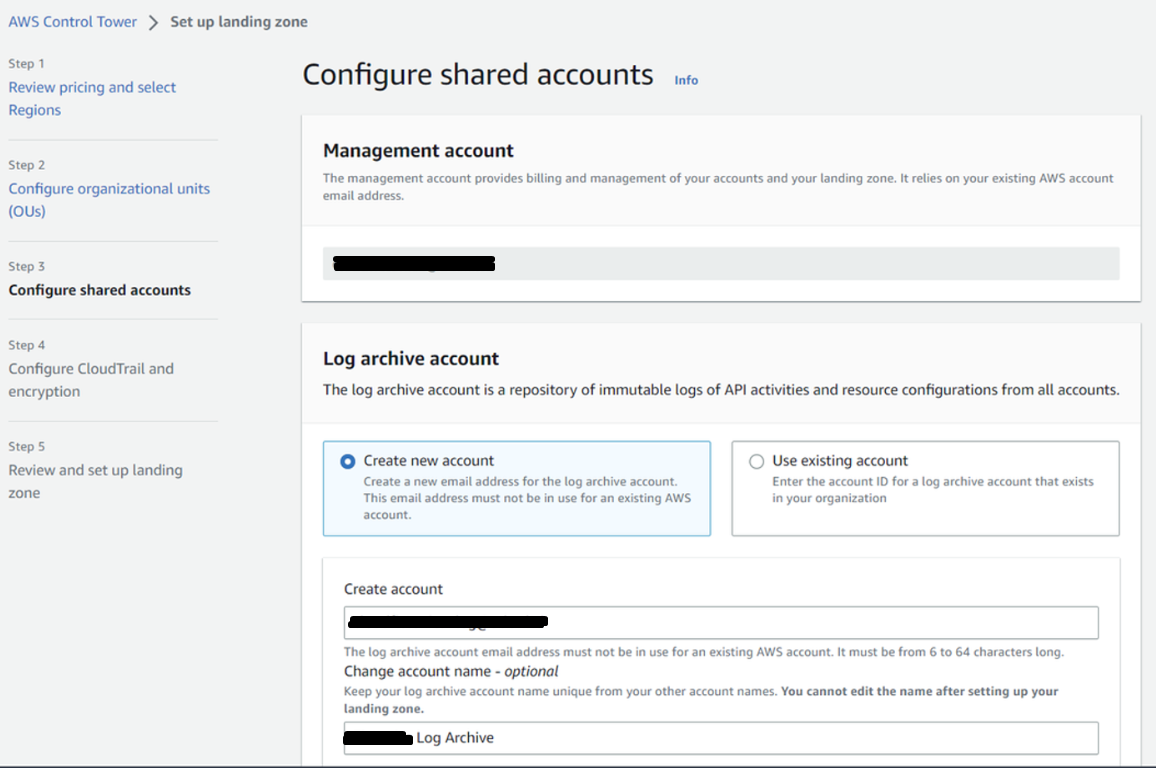
Configure shared accounts
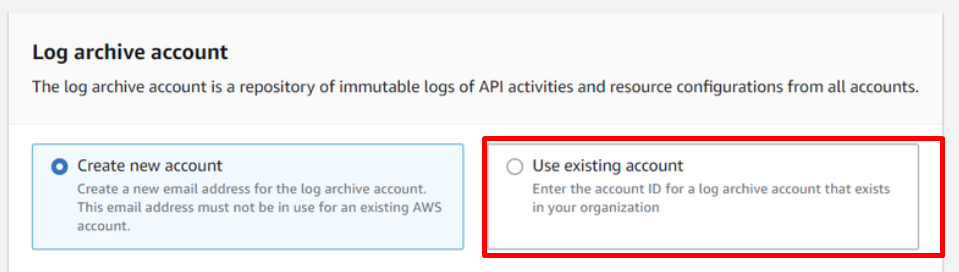
1. Creating new account:
In Log archive account section, select **Create new account**and give an account email address ( 💡Tip: use email alias) which is not in use for an existing AWS account. In Log archive account, you can also change the account name which is optional.
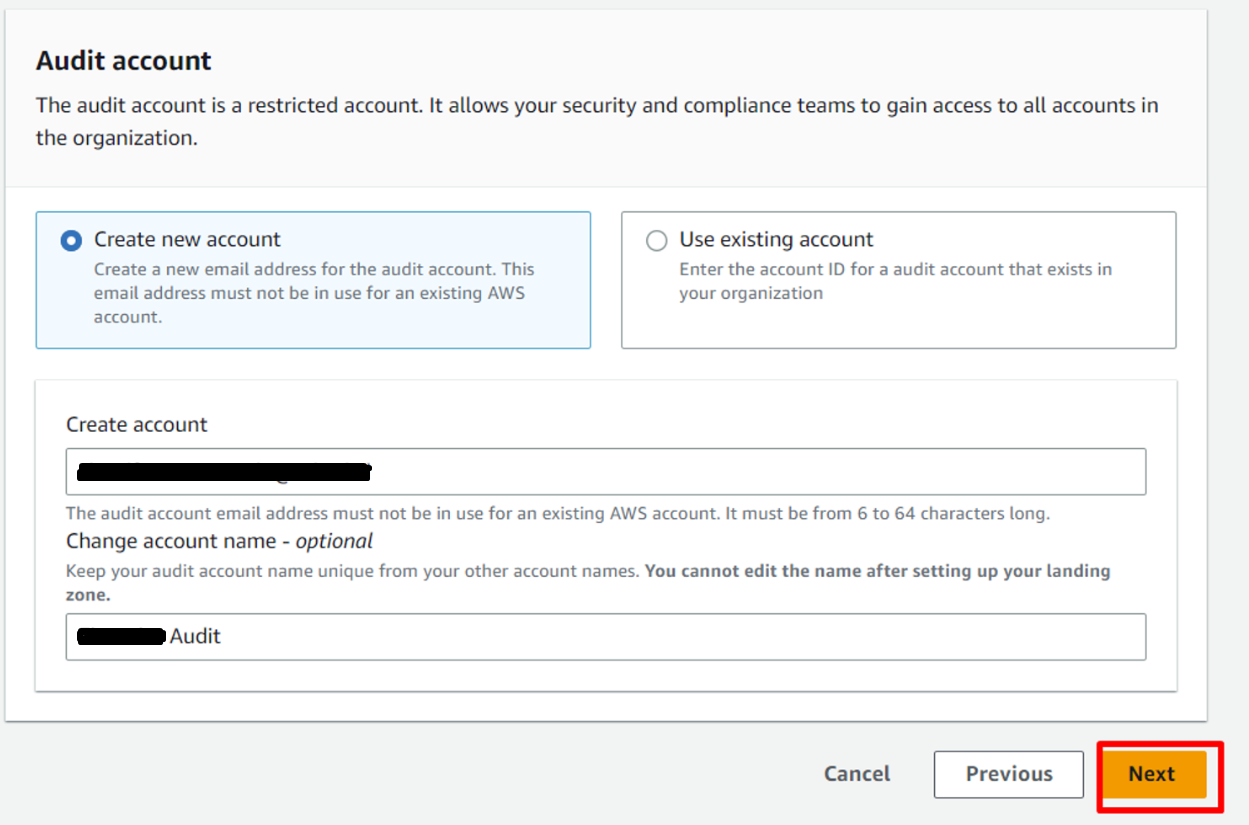
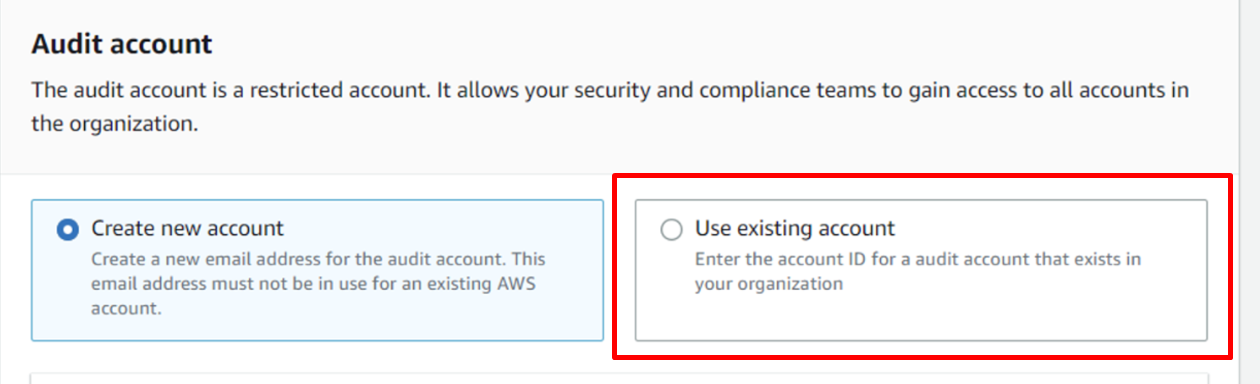
Audit account:
- In
Audit accountsection, selectCreate new accountand give an account email address (💡Tip: use email alias) which is not in use for an existing AWS account. Also, inAudit account, you can change the account name which is optional. ClickNextto proceed.
2. Using an existing account
- Check out Consideration for bringing existing security and logging accounts.
- AWS Control Tower will move the existing accounts to the OU that it creates as a part of the deployment.
- AWS Control Tower creates its own Config Aggregator in addition to any Config aggregator that you may have.
- If you have AWS Config deployed in any other accounts that you want to enroll with AWS Control Tower and you still want to continue the same AWS Config recorder and Delivery Channel with AWS Control Tower, then you must follow the steps here before deploying AWS Control Tower.
You must have the following prerequisites before proceeding:
- Existing core or shared account(s) must already be part of your organization.
- Delete the AWS Config recorder and AWS Config Delivery channel from the accounts that you want to use for this feature. This must be done for every region that you want to govern with AWS Control Tower.
Steps to use Deploy Control Tower with existing accounts:
- In
Log archive accountselectUse existing account.
- Enter an existing
12-digit account id. - In
Audit accountselectUse existing account
- Enter an existing
12-digit account id. - Click
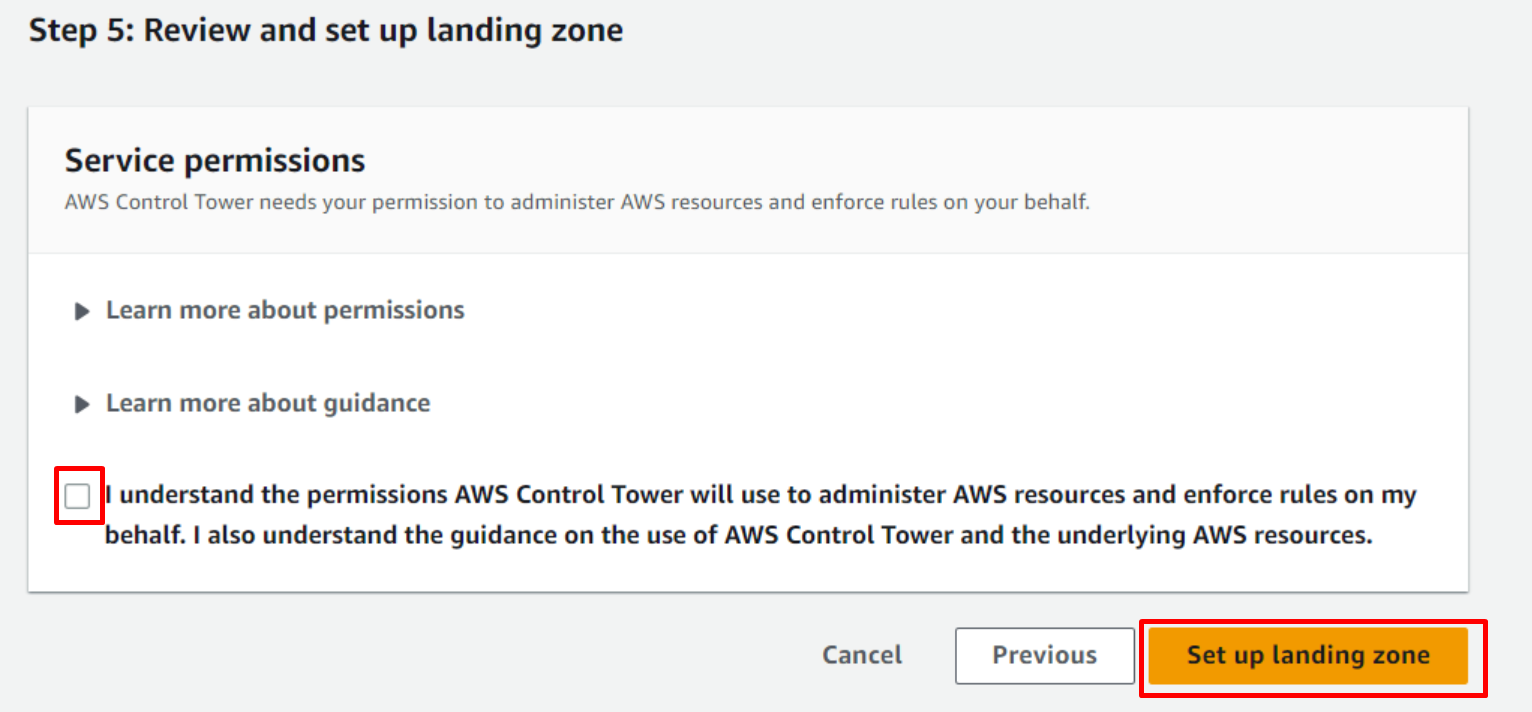
Next. - Review the Service permissions, and when you’re ready, choose I understand the permissions AWS Control Tower will use to administer AWS resources and enforce rules on my behalf.
- To finalize your selections and initialize launch, choose Set up landing zone.
Once AWS Control Tower is fully deployed, you’ll see that the accounts that you used in the steps above are now registered with AWS Control Tower, showing as Enrolled in the AWS Control Tower dashboard. If not then you’ll have to enrolled the account by yourself.
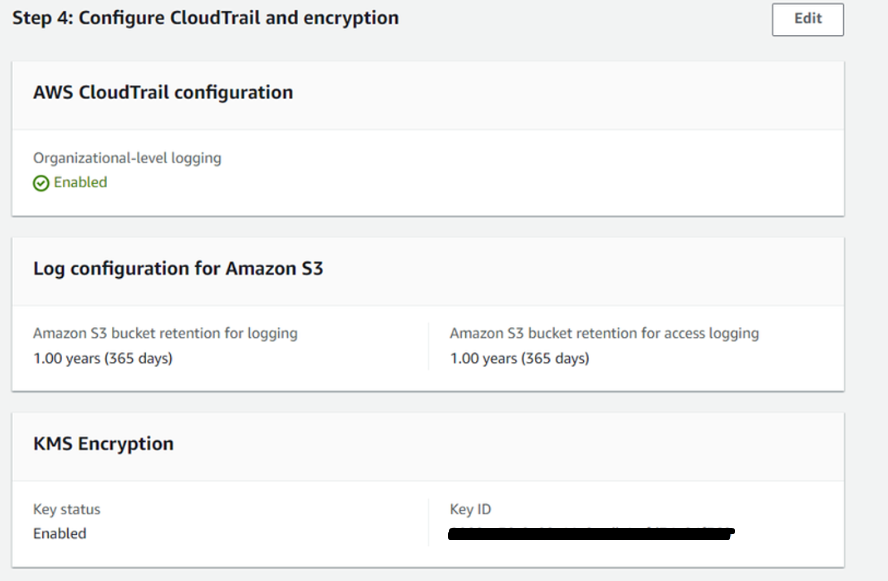
Configure CloudTrail and encryption
- Select Enabled option in AWS CloudTrail Configuration section.

- In Log configuration for Amazon S3, provide the number of years for retention of logs in the S3 bucket.
- Amazon S3 bucket retention for logging – 1 year (Default) Amazon S3 bucket retention for access login – 10 years (Default)
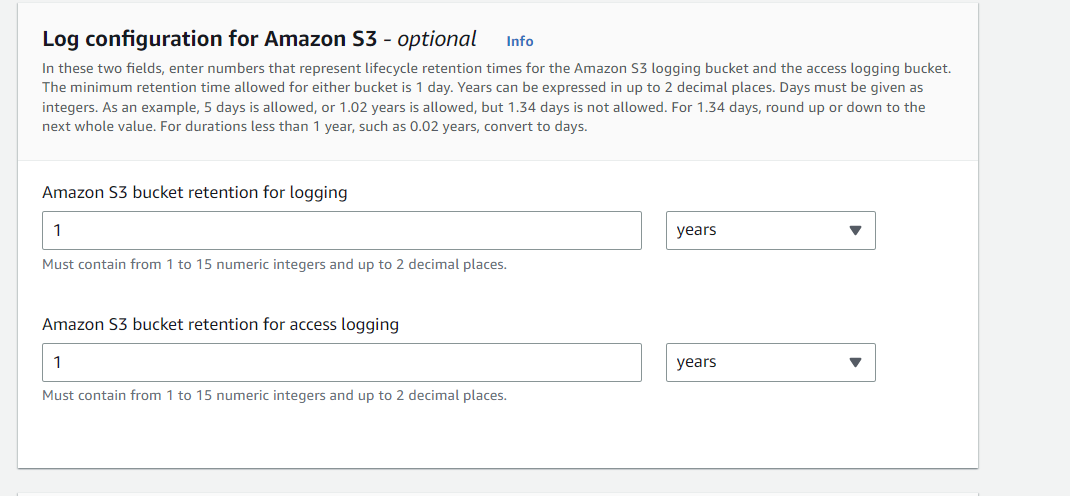
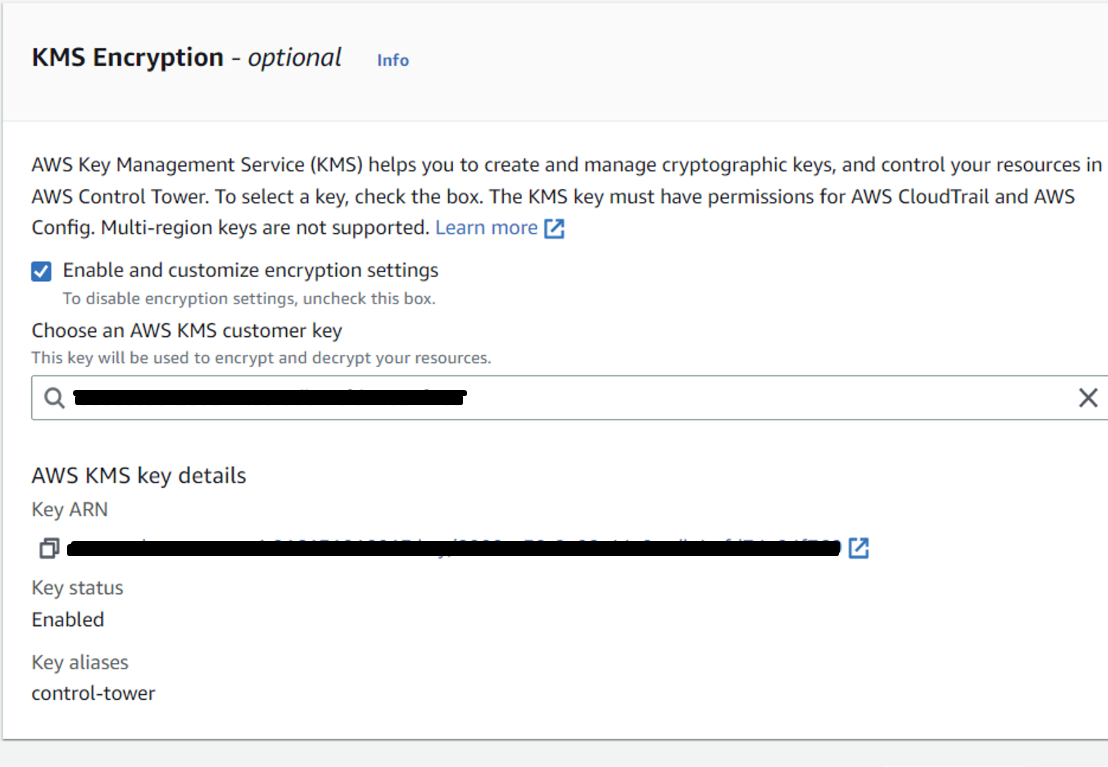
- KMS Encryption is optional, however it is recommended to enable. To enable click on the Enable and customize encryption settings checkbox. You can choose an AWS key (if exists) or create a new KMS key and Click
Nextto proceed.
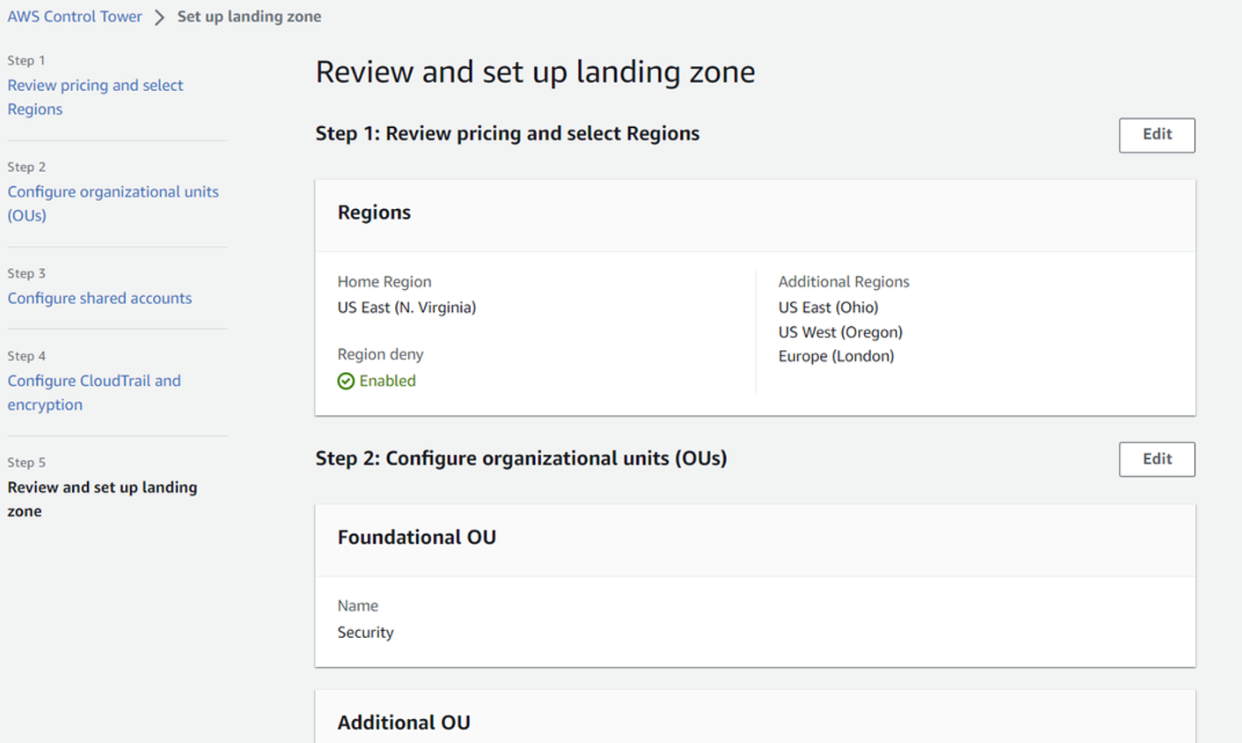
Review and set up landing zone
You will be asked to review all the configuration. Once final review is completed click on Set up landing zone.

Configuration choices that can not be undone:
- You can not change your home region after you’ve set up your landing zone.
- If you’re provisioning Account Factory accounts with VPCs, VPC CIDRs can’t be changed after they are created.
In Conclusion
By restricting the blast radius and controlling and maintaining the environments, AWS Landing Zone can also assist with authorization, billing, and resource limits. Also, it helps to save time by automating the set-up of an environment for running secure and scalable workloads while implementing an initial security baseline through the creation of core accounts and resources.
Feel free to connect with me on other platforms:
GitHub: https://github.com/saugat86
LinkedIn: https://www.linkedin.com/in/saugattiwari/
Medium: saugattiwari.medium.com
Portfolio: https://saugaattiwari.com.np/