AWS Lambda MicroVMs: A Hands-On Guide from Zero to Running
Introduction
If you have been building multi-tenant applications where end users or AI can execute code, you already know the problem. Every user needs their own isolated environment to run code safely, and until this week, getting strong isolation, fast startup, and persistent state all at once required you to either accept serious tradeoffs or build custom virtualization infrastructure from scratch.
AWS announced Lambda MicroVMs on June 22, 2026, and it is one of the more significant serverless releases in recent memory. This post breaks down what it is, how it works, how to get started, and where it actually makes sense to use it.
The Problem Lambda MicroVMs Solves:
Before getting into the what and the how, it is worth understanding why this matters.
A growing class of applications: AI coding assistants, interactive coding environments, data analytics platforms, vulnerability scanners: all share one requirement: each user or session needs its own dedicated, isolated compute environment to safely execute code that the developer did not write.
Before Lambda MicroVMs, your options looked like this:
| Option | Isolation | Startup Speed | State Retention |
|---|---|---|---|
| Virtual Machines | Strong (dedicated kernel) | Minutes | Full |
| Containers | Weaker (shared kernel) | Seconds | Limited |
| Lambda Functions | Strong | Milliseconds | Stateless |
Each option forces a tradeoff. VMs give you strong isolation but take too long to start that kills the user experience in interactive applications. Containers start quickly but their shared-kernel architecture requires significant custom hardening to safely contain untrusted code. Lambda Functions are excellent for event-driven, request-response workloads but are not designed for long-running interactive sessions that need to retain environment state across user interactions.
That leaves developers either accepting these tradeoffs between performance and isolation, or investing significant engineering time building and operating custom virtualization infrastructure. Neither is a great answer when the actual product you are trying to ship is an AI coding assistant or a data analytics platform, not a virtualization layer.
Lambda MicroVMs is purpose-built to close this gap.
What Are Lambda MicroVMs?
Lambda MicroVMs is a new serverless compute primitive within AWS Lambda that provides:
- VM-level isolation: Each session runs in its own dedicated MicroVM with no shared kernel and no shared resources between users, so untrusted code from one user cannot reach another user’s environment or the underlying system.
- Near-instant launch and resume: MicroVMs boot from a pre-initialized snapshot instead of starting cold, which means even multi-gigabyte interactive sessions come back online fast enough to feel responsive to the end user.
- Stateful execution: Running MicroVMs retain memory, disk, and running processes across the user’s session for up to 8 hours of total runtime.
- No infrastructure to manage: AWS handles the entire virtualization layer. No expertise in complex virtualization technologies required.
It is built on Firecracker, the same lightweight virtualization technology that powers over 15 trillion monthly Lambda function invocations. That operational maturity matters when you are running this in production.
One important clarification: Lambda MicroVMs is not a replacement for Lambda Functions. Standard Lambda Functions remain the right choice for event-driven, request-response workloads. MicroVMs are purpose-built for multi-tenant applications that need to hand each user or session their own isolated environment for executing user or AI-generated code. The two are meant to complement each other, you can use Lambda Functions for your event-driven backbone and call into Lambda MicroVMs for the steps that need to run untrusted code in isolation.
How Lambda MicroVMs Work
The model is image-then-launch.
- You package your application code and a Dockerfile together as a zip artifact and upload it to S3.
- Lambda builds a MicroVM Image: it runs your Dockerfile, initializes your application, and takes a Firecracker snapshot of the running environment’s memory and disk state.
- Every subsequent MicroVM launched from that image resumes from the pre-initialized snapshot rather than booting cold.
Each MicroVM gets a unique ID, a dedicated HTTPS endpoint URL, and support for HTTP/2, gRPC, and WebSockets out of the box. No networking setup required on your end.
During idle periods, a MicroVM can be suspended automatically based on a lifecycle policy you define, with memory and disk state fully preserved. When the next request arrives, it resumes. From the client side, the pause never happened, installed packages, loaded models, and any working file sets are all readily available.
Current specs per MicroVM:
| Spec | Value |
|---|---|
| Architecture | ARM64 |
| Max vCPUs | 16 |
| Max Memory | 32 GB |
| Max Disk | 32 GB |
| Max Runtime | 8 hours |
Architecture Diagram
The diagram below shows the full flow: the build path on the left where your code artifact goes from S3 through the MicroVM image build process, and the request path on the right where each client gets their own isolated Firecracker MicroVM instance with a dedicated HTTPS endpoint.
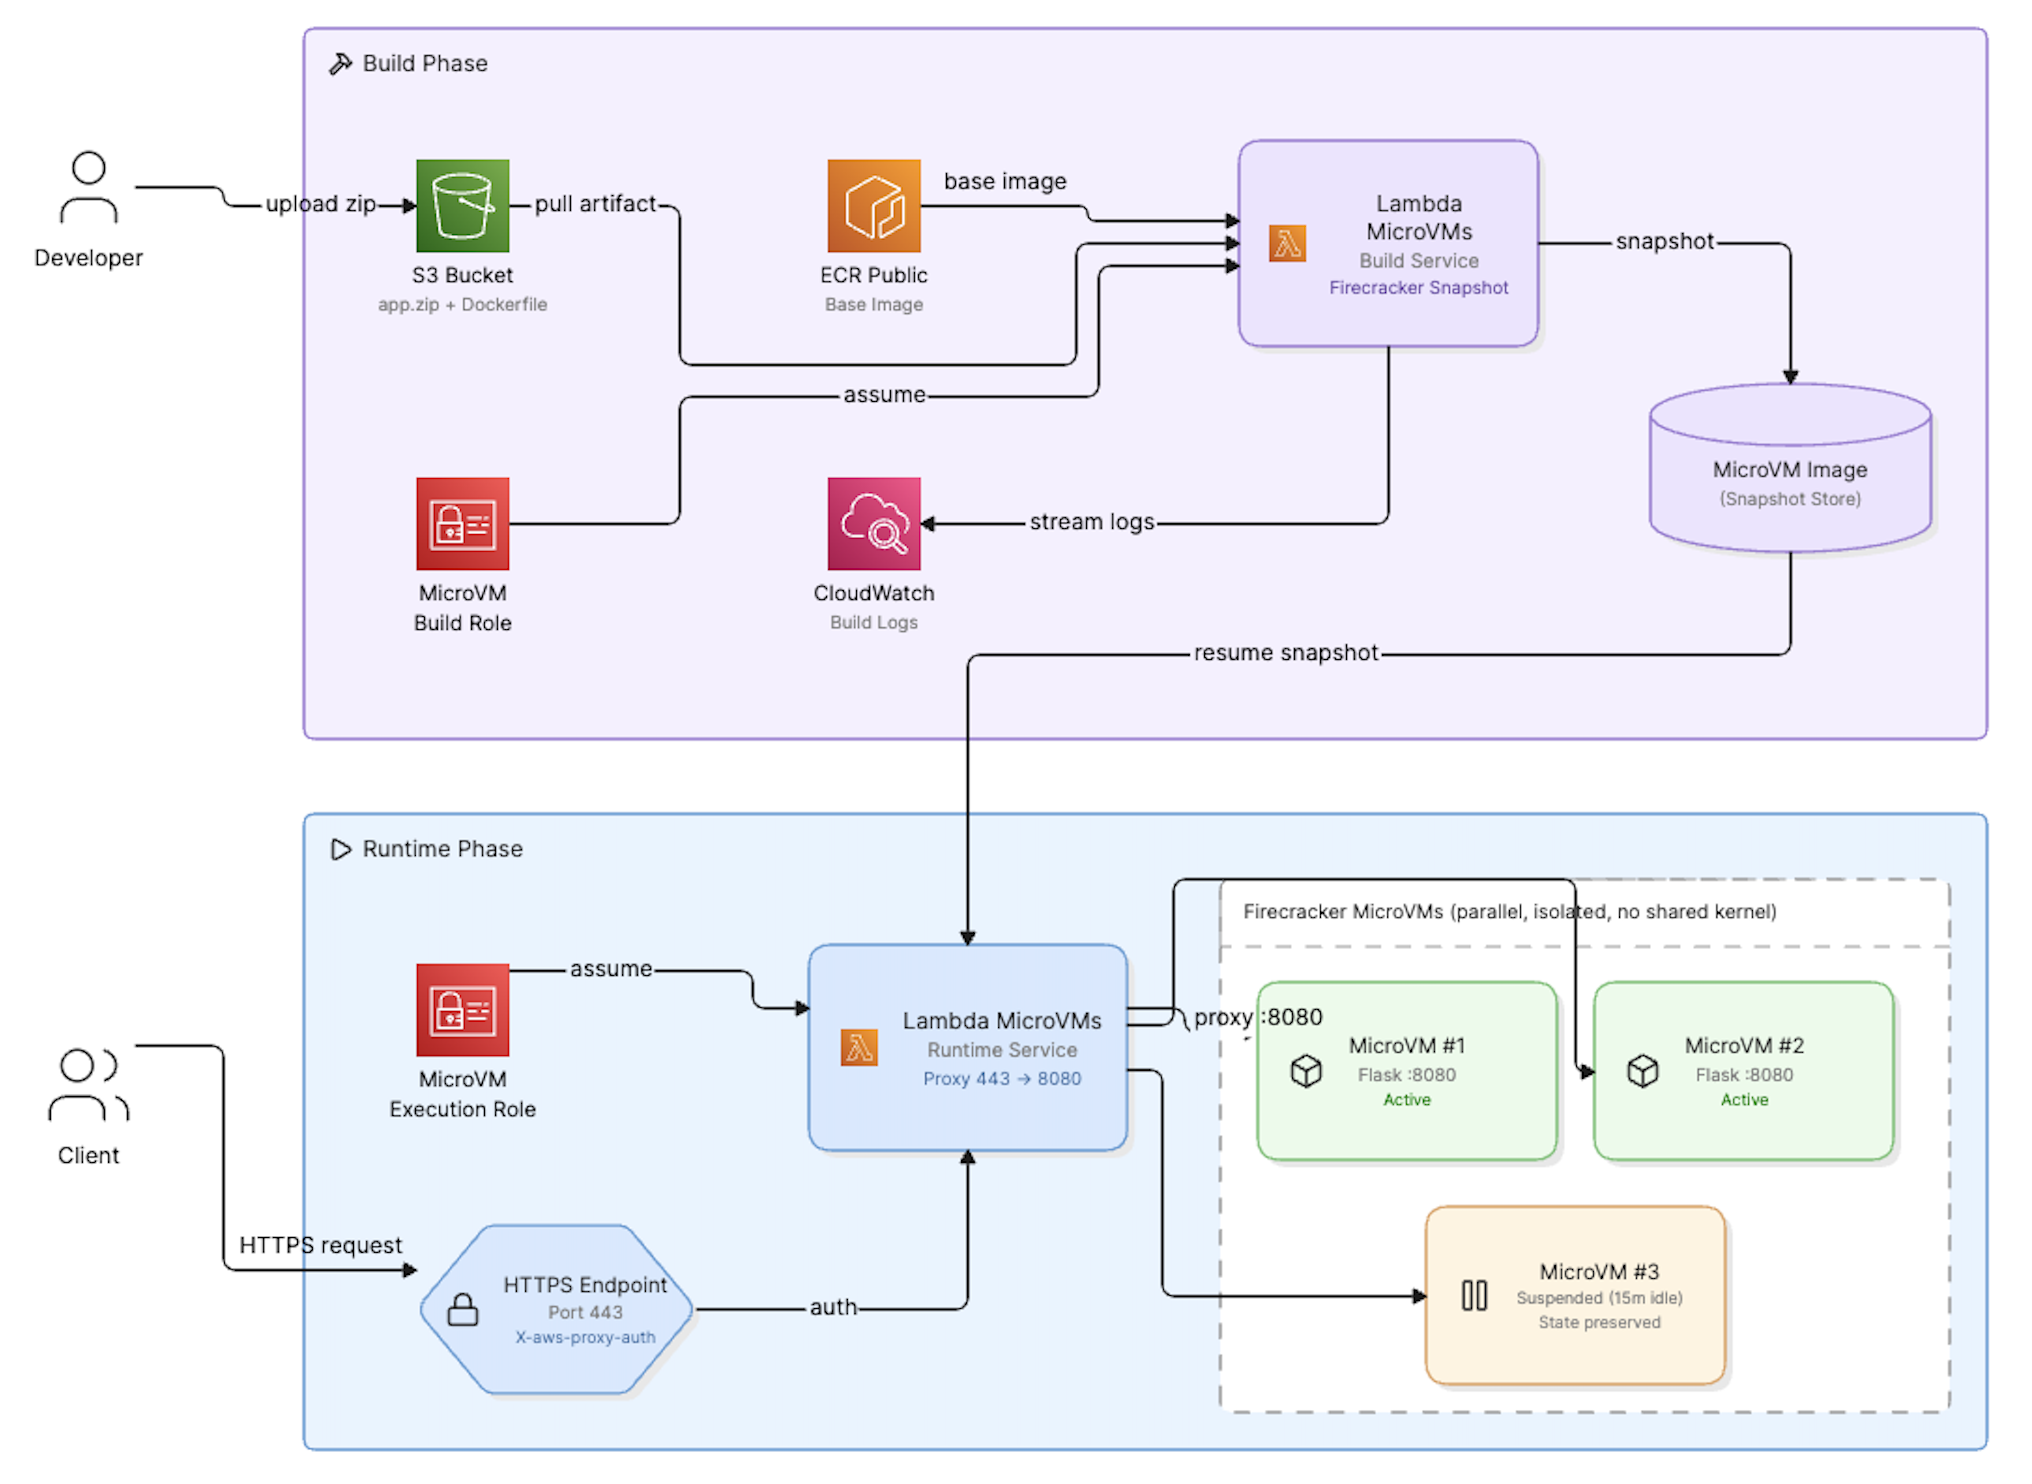
Architecture diagram showing the Lambda MicroVMs build and request flow on AWS
Prerequisites:
Before starting, make sure you have:
- AWS CLI installed and configured with Administrator access
- An S3 bucket to store your code artifact
- AWS CLI version that includes the
lambda-microvmssubcommand
Verify your credentials and region:
aws sts get-caller-identity
aws configure get region
Step-by-Step Implementation
Step 1: Create the Project Files
Create a project directory and set up three files.
mkdir lambda-microvm-demo && cd lambda-microvm-demo
app.py
import logging
from flask import Flask, jsonify

app = Flask(__name__)
logging.basicConfig(level=logging.INFO)

@app.route("/")
def hello():
    app.logger.info("Received request")
    return jsonify(message="Hello from Lambda MicroVM!")

if __name__ == "__main__":
    app.run(host="0.0.0.0", port=8080)
requirements.txt
flask==3.0.0
gunicorn==21.2.0
Dockerfile
FROM public.ecr.aws/lambda/microvms:al2023-minimal
RUN dnf install -y python3 python3-pip && dnf clean all

WORKDIR /app
COPY requirements.txt .
RUN pip install --no-cache-dir -r requirements.txt
COPY app.py .

EXPOSE 8080
CMD ["gunicorn", "--bind", "0.0.0.0:8080", "app:app"]
Step 2: Package and Upload to S3
zip app.zip app.py requirements.txt Dockerfile
aws s3 cp app.zip s3://<your-bucket>/app.zip
You should see:
upload: ./app.zip to s3://<your-bucket>/app.zip


Step 3: Create the IAM Roles
You need two roles: one for building the MicroVM image and one for running MicroVMs.
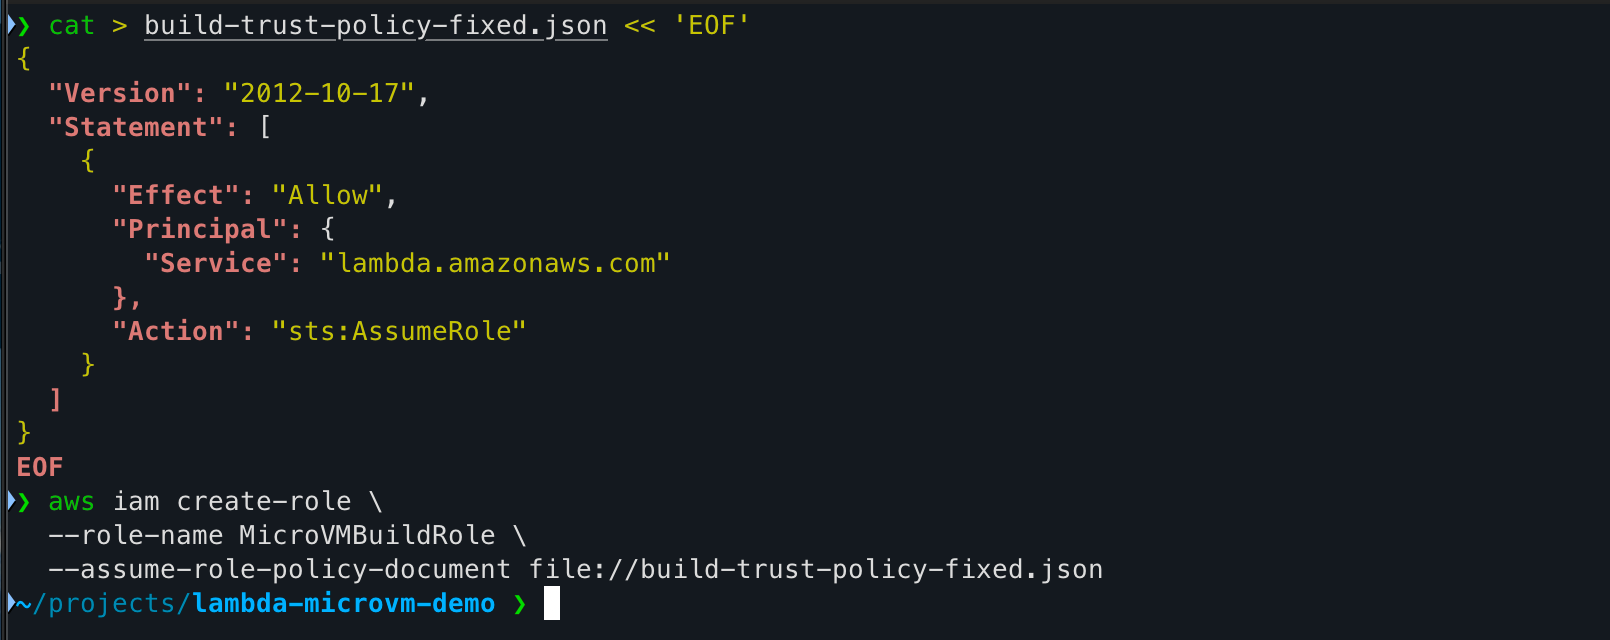
MicroVMBuildRole
cat > build-trust-policy.json << 'EOF'
{
  "Version": "2012-10-17",
  "Statement": [
    {
      "Effect": "Allow",
      "Principal": {
        "Service": "lambda.amazonaws.com"
      },
      "Action": "sts:AssumeRole"
    }
  ]
}
EOF
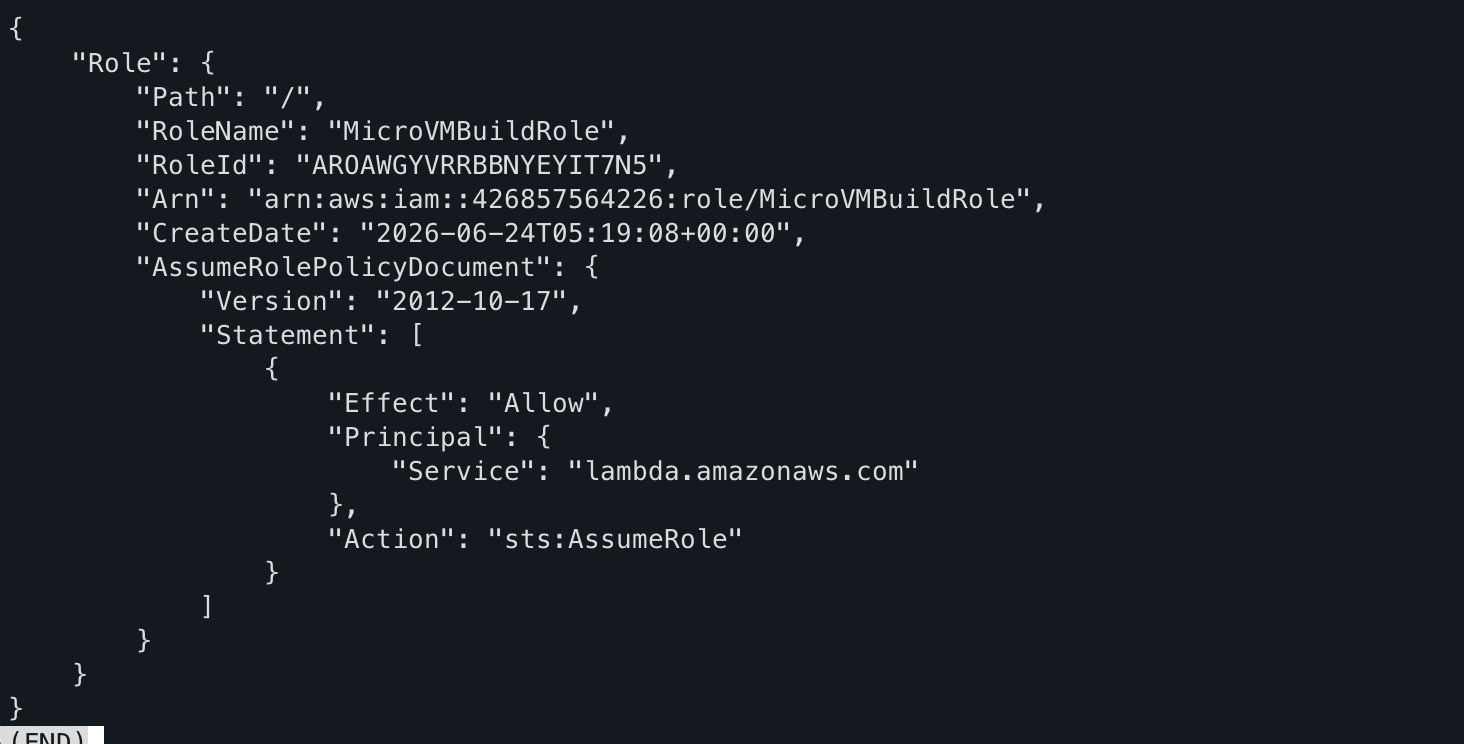
aws iam create-role \
  --role-name MicroVMBuildRole \
  --assume-role-policy-document file://build-trust-policy.json

aws iam attach-role-policy \
  --role-name MicroVMBuildRole \
  --policy-arn arn:aws:iam::aws:policy/AmazonS3ReadOnlyAccess

aws iam attach-role-policy \
  --role-name MicroVMBuildRole \
  --policy-arn arn:aws:iam::aws:policy/CloudWatchLogsFullAccess

aws iam attach-role-policy \
  --role-name MicroVMBuildRole \
  --policy-arn arn:aws:iam::aws:policy/AmazonEC2ContainerRegistryReadOnly
MicroVMExecutionRole
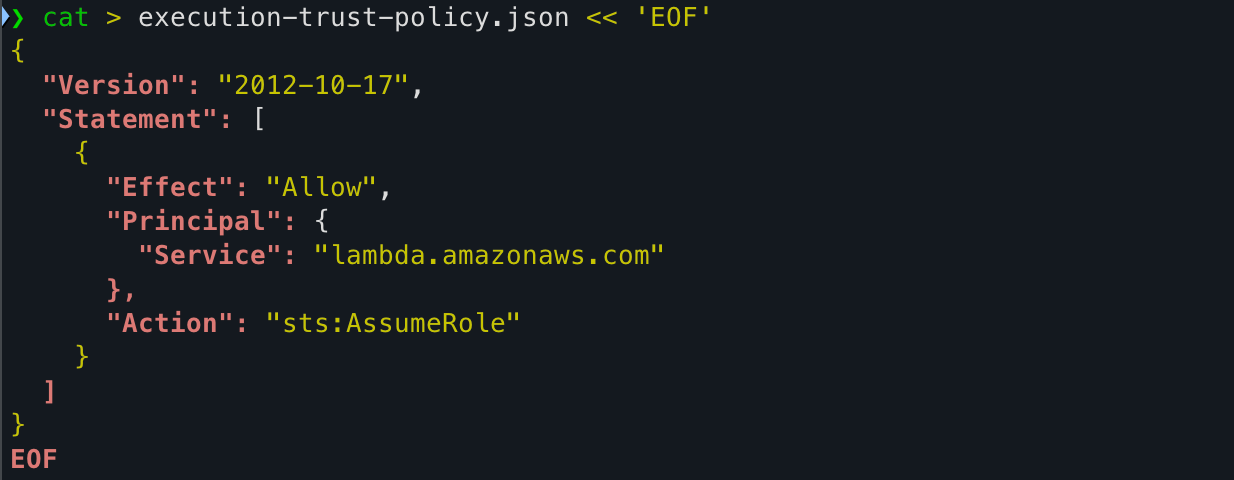
cat > execution-trust-policy.json << 'EOF'
{
"Version": "2012-10-17",
"Statement": [
{
"Effect": "Allow",
"Principal": {
"Service": "lambda.amazonaws.com"
},
"Action": "sts:AssumeRole"
}
]
}
EOF
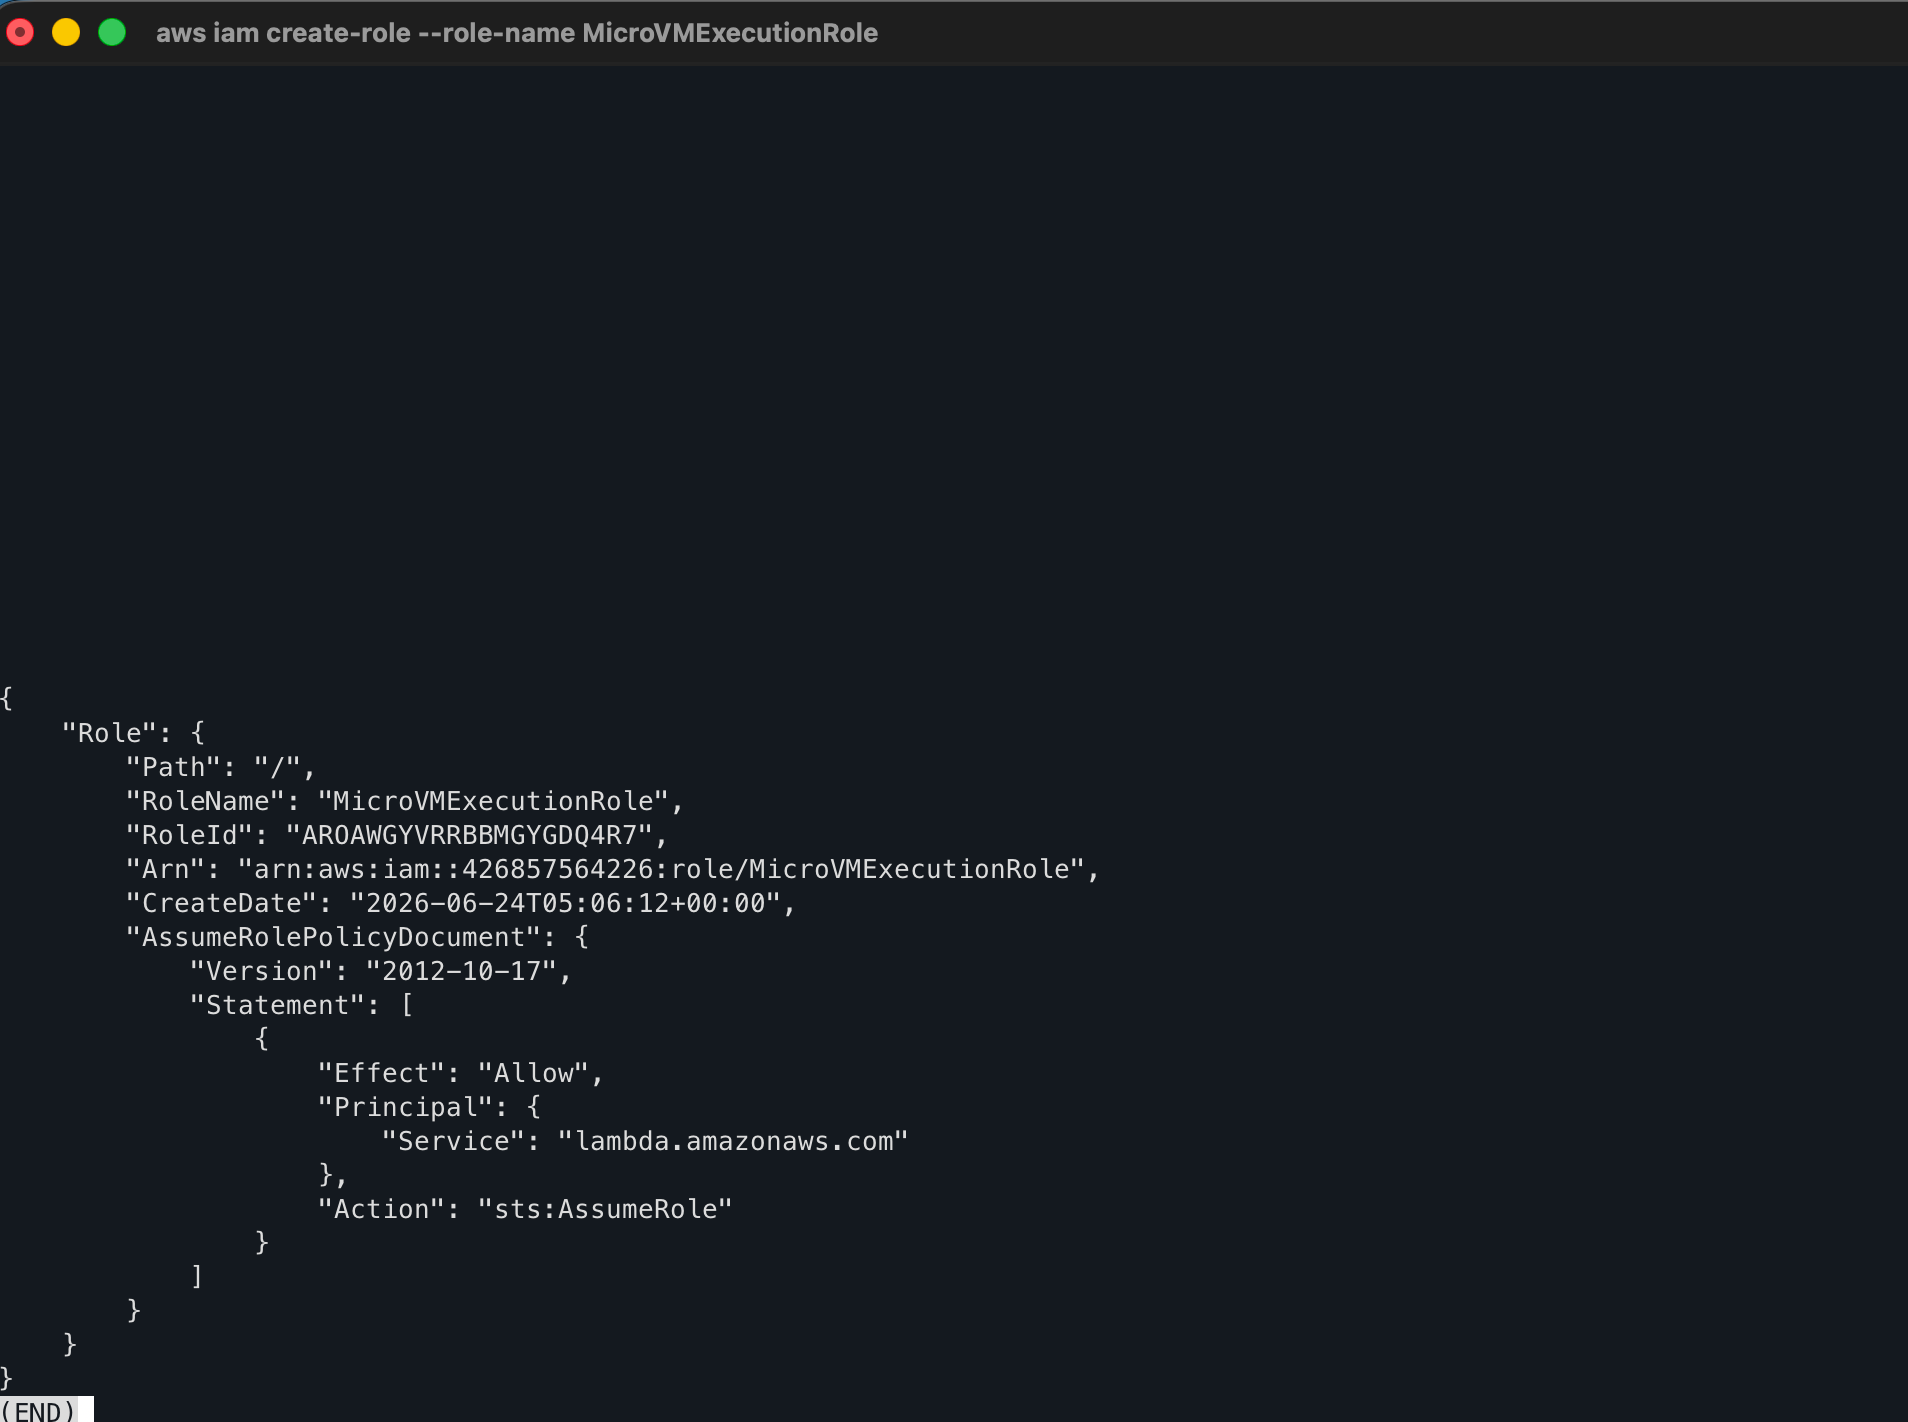
aws iam create-role \
--role-name MicroVMExecutionRole \
--assume-role-policy-document file://execution-trust-policy.json
aws iam attach-role-policy \
--role-name MicroVMExecutionRole \
--policy-arn arn:aws:iam::aws:policy/service-role/AWSLambdaBasicExecutionRole
aws iam attach-role-policy \
--role-name MicroVMExecutionRole \
--policy-arn arn:aws:iam::aws:policy/CloudWatchLogsFullAccess
Verify both roles exist before proceeding:
aws iam get-role --role-name MicroVMBuildRole --query 'Role.Arn'
aws iam get-role --role-name MicroVMExecutionRole --query 'Role.Arn'
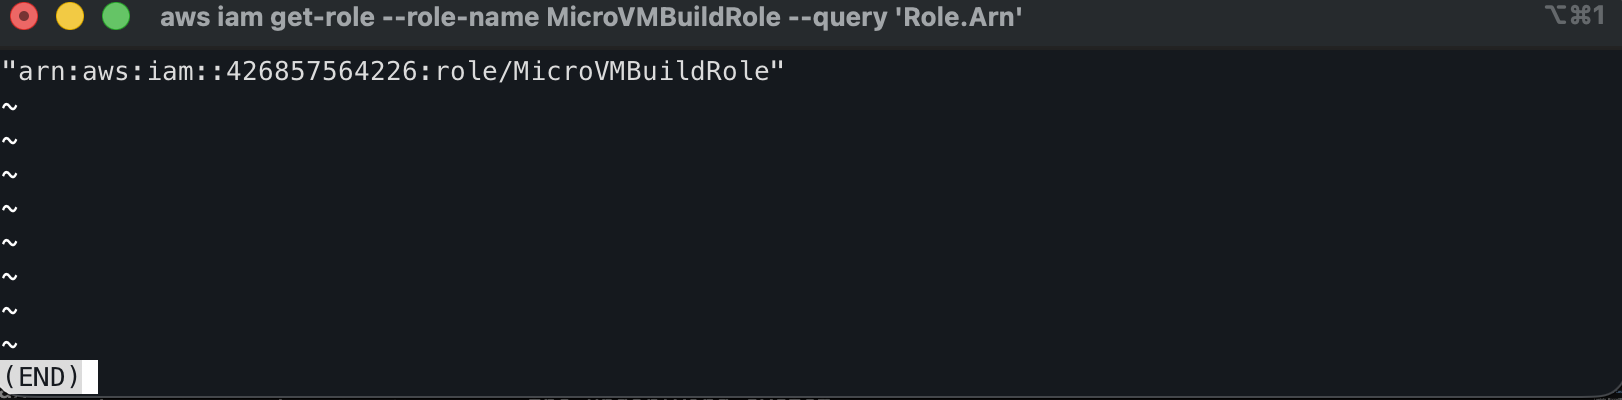
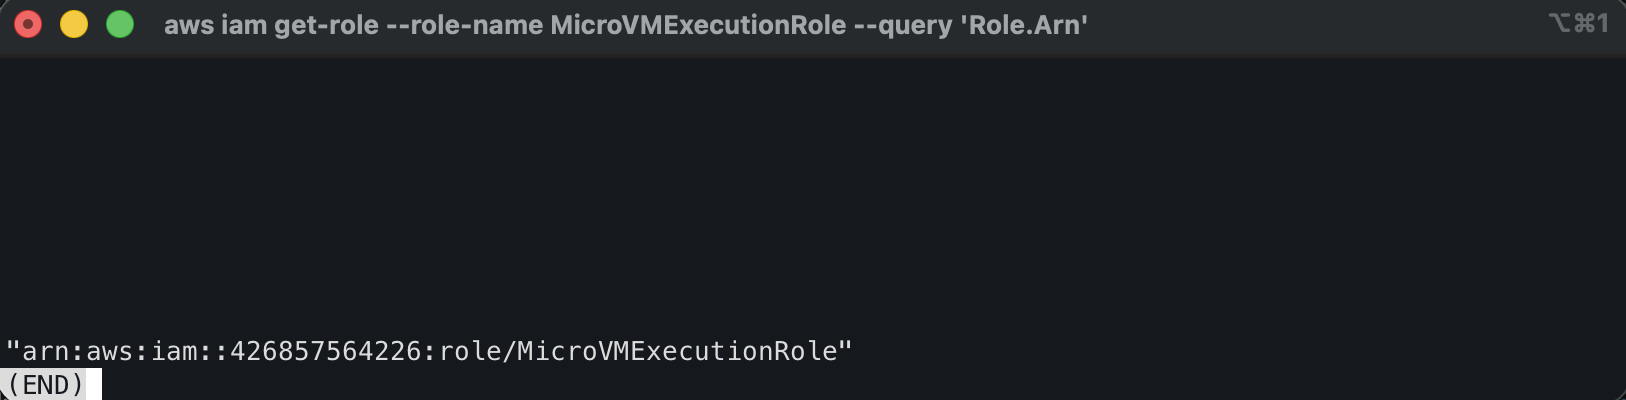
If either returns NoSuchEntity, the role creation failed silently. Fix it before moving on — creating the image without a valid build role will succeed but the image will fail to build with no logs to debug from.
Step 4: Create the MicroVM Image

aws lambda-microvms create-microvm-image \
  --code-artifact uri=s3://<your-bucket>/app.zip \
  --name my-flask-microvm \
  --base-image-arn arn:aws:lambda:us-east-1:aws:microvm-image:al2023-1 \
  --build-role-arn arn:aws:iam::<account-id>:role/MicroVMBuildRole \
  --region us-east-1
It returns:

Poll the build status every 30 seconds:
aws lambda-microvms get-microvm-image \
  --image-identifier arn:aws:lambda:us-east-1:<account-id>:microvm-image:my-flask-microvm \
  --region us-east-1 \
  --query 'state'
Build logs stream in real time to CloudWatch Logs under /aws/lambda/microvms/my-flask-microvm. The build typically takes 2–5 minutes. Wait until state returns "ACTIVE" before proceeding.
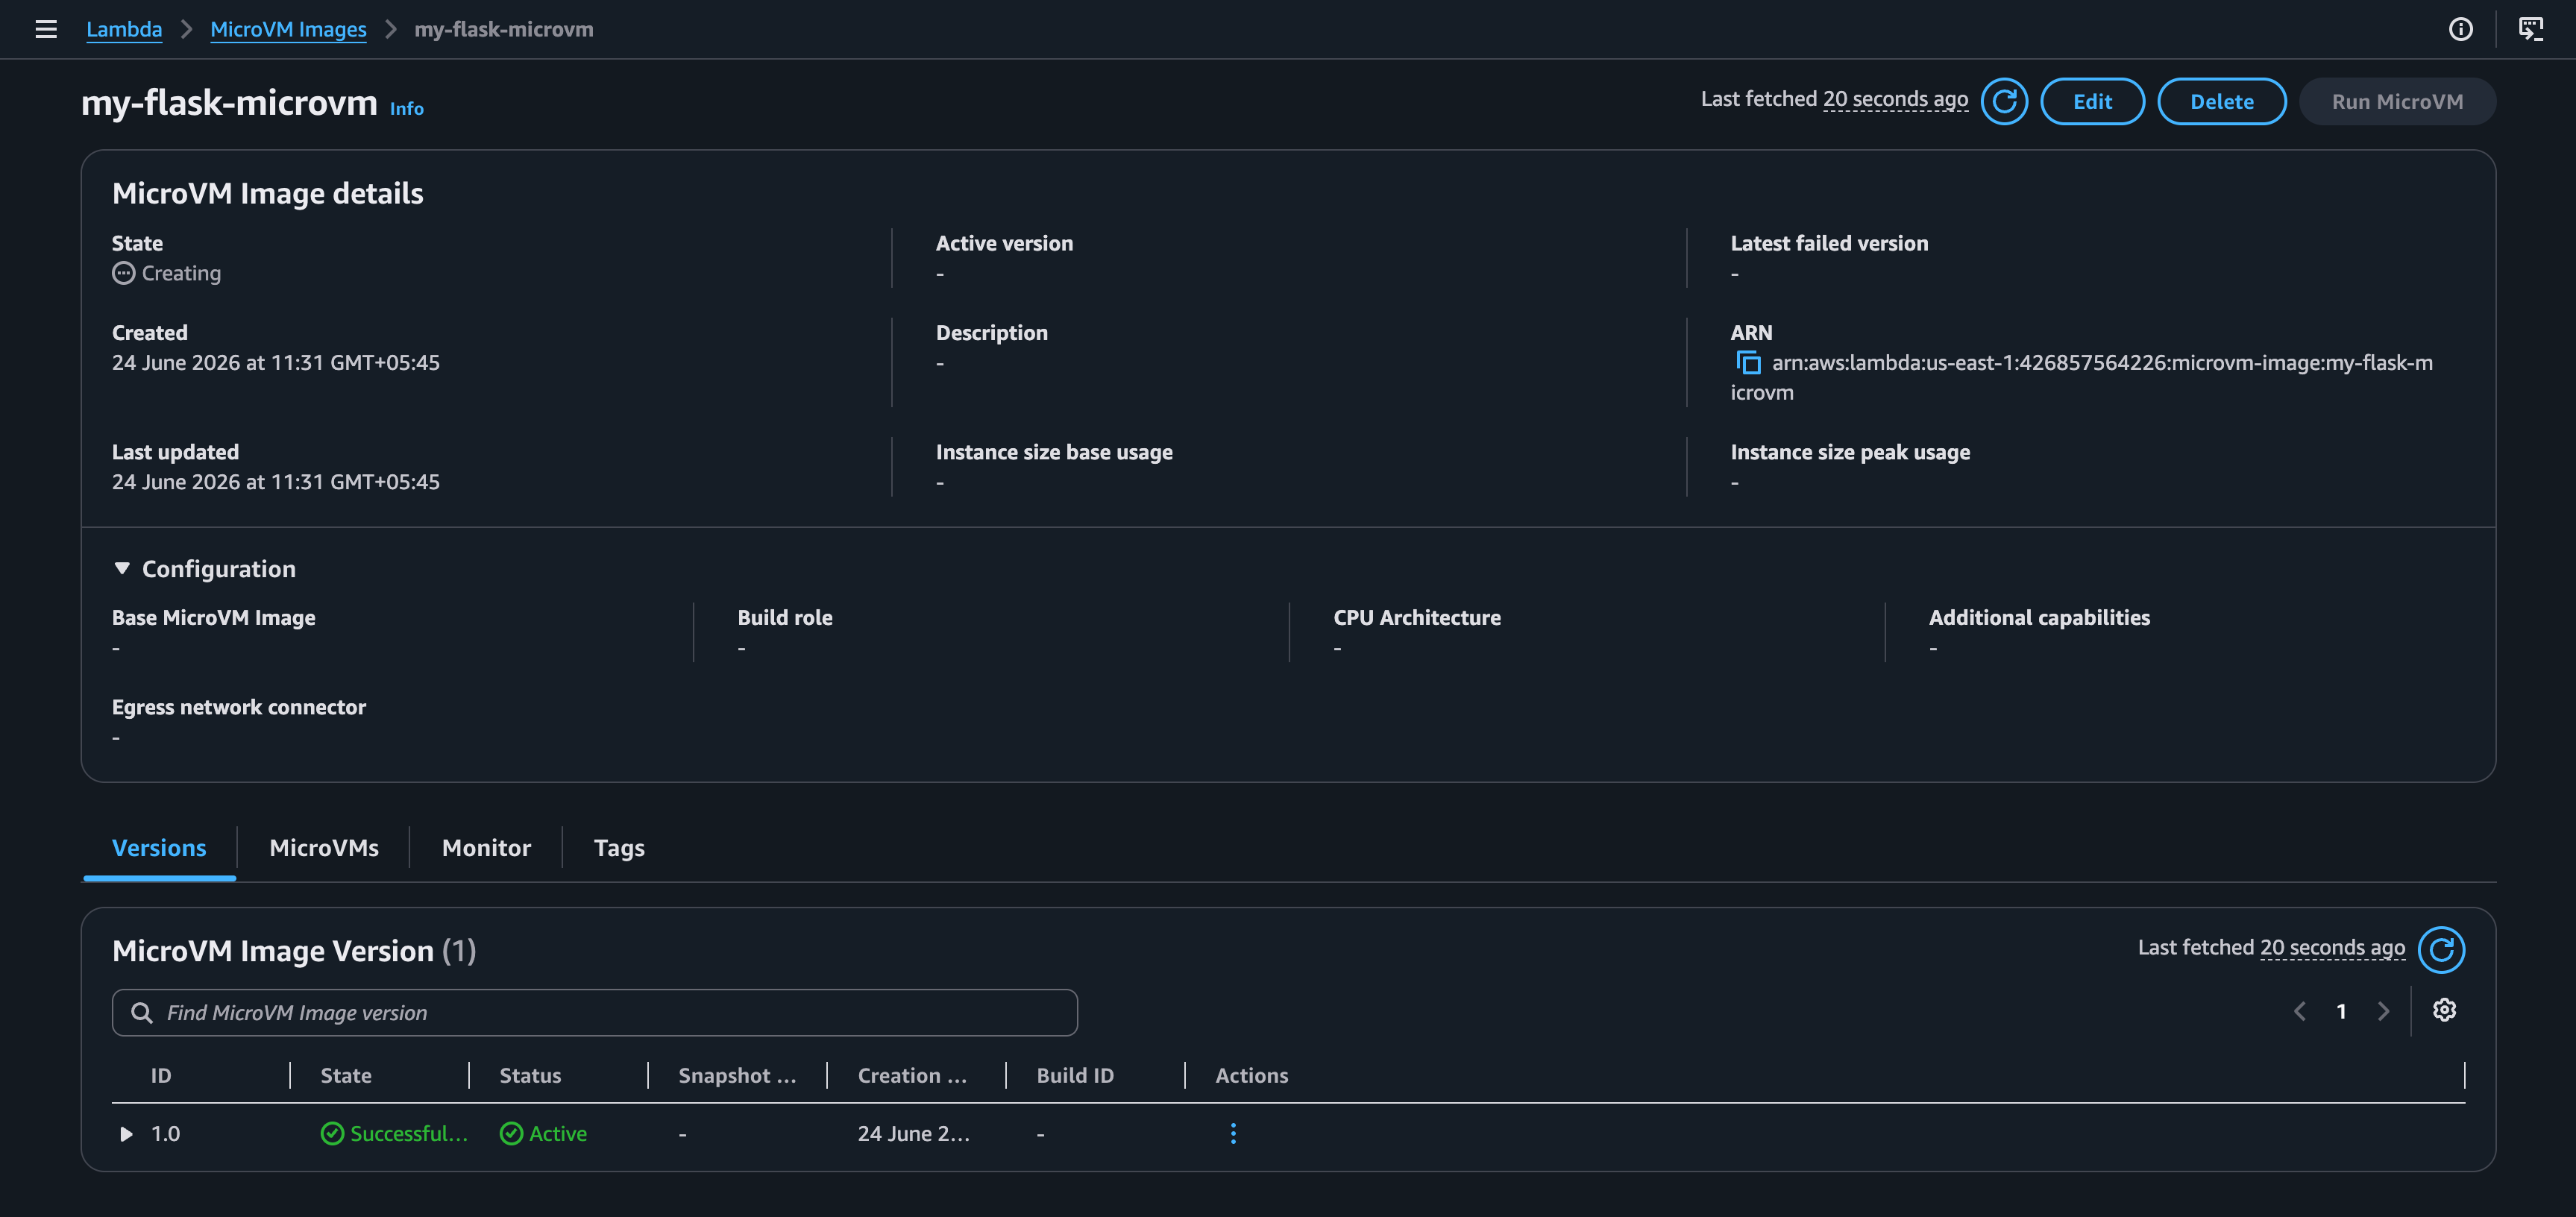
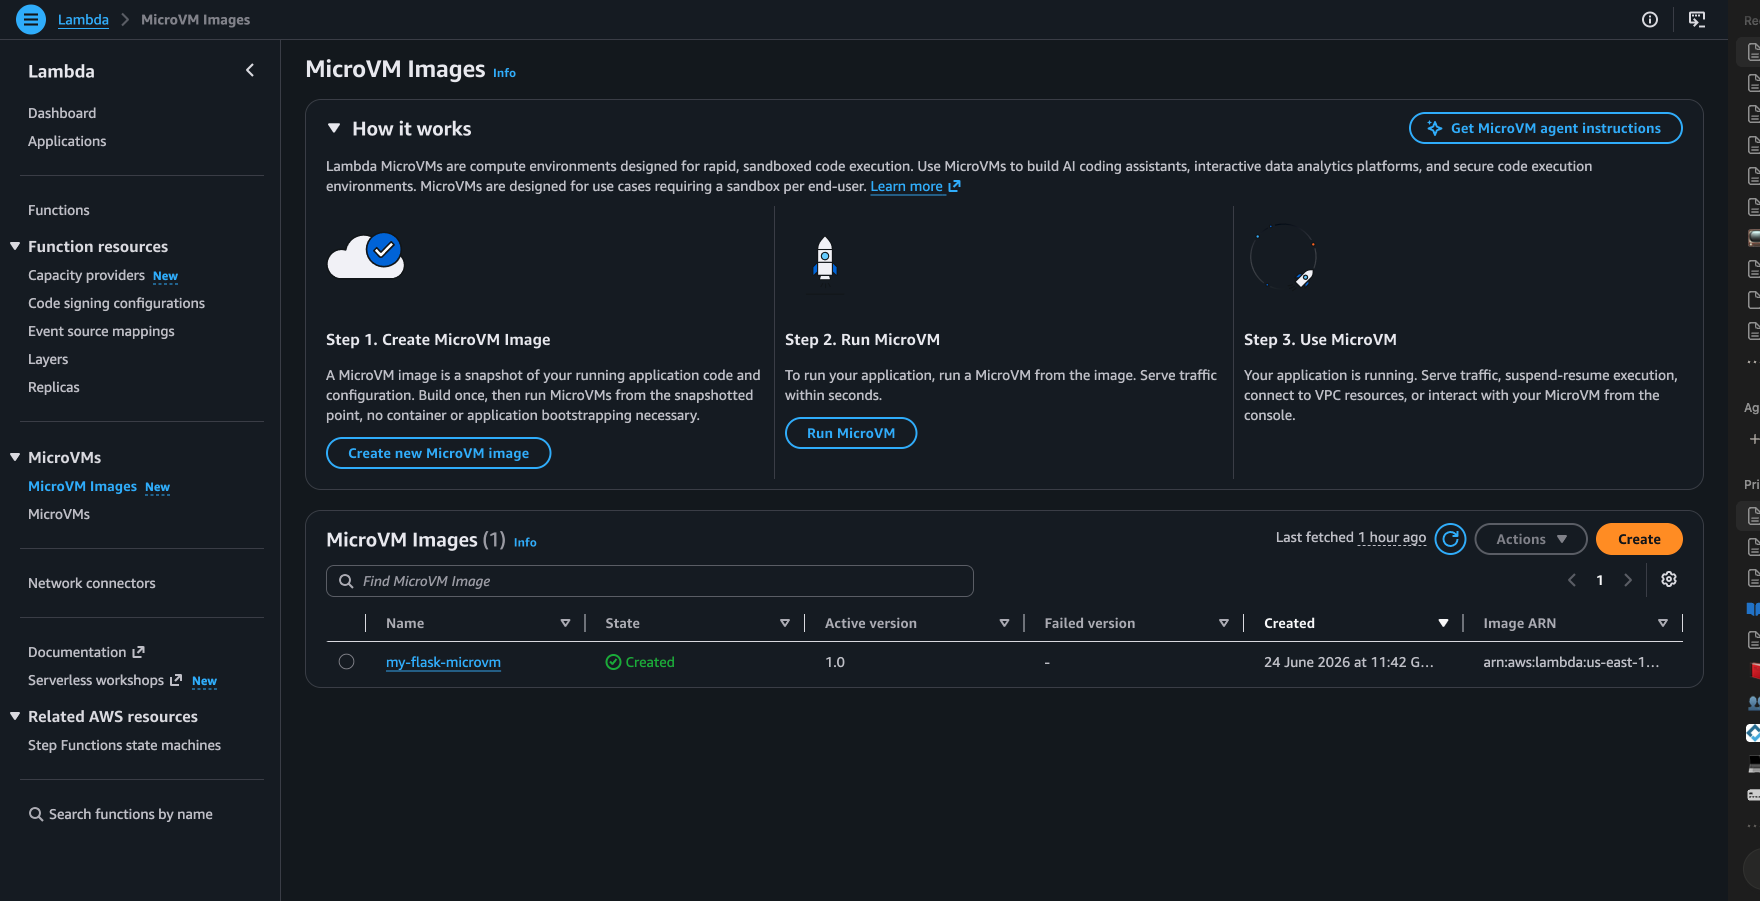
Instead, you can also track this in the AWS Console under Lambda > MicroVM Images > my-flask-microvm.
Step 5: Launch the MicroVM
aws lambda-microvms run-microvm \
  --image-identifier arn:aws:lambda:us-east-1:<account-id>:microvm-image:my-flask-microvm \
  --execution-role-arn arn:aws:iam::<account-id>:role/MicroVMExecutionRole \
  --idle-policy '{"maxIdleDurationSeconds":900,"suspendedDurationSeconds":300,"autoResumeEnabled":true}' \
  --region us-east-1

The idle policy above configures the MicroVM to auto-suspend after 15 minutes of inactivity and auto-resume on the next incoming request.
Above returns:

Get the full MicroVM details including the endpoint:
aws lambda-microvms get-microvm \
  --microvm-id <microvm-id> \
  --region us-east-1
The response looks like this:
{
    "microvmId": "microvm-a6c50027-7149-3f34-a4ef-c329e9e111d7",
    "state": "RUNNING",
    "endpoint": "68cf7c1b-70f5-a080-37c4-ad33b835bc68.lambda-microvm.us-east-1.on.aws",
    "imageArn": "arn:aws:lambda:us-east-1:<account-id>:microvm-image:my-flask-microvm",
    "imageVersion": "1.0",
    "executionRoleArn": "arn:aws:iam::<account-id>:role/MicroVMExecutionRole",
    "idlePolicy": {
        "maxIdleDurationSeconds": 900,
        "suspendedDurationSeconds": 300,
        "autoResumeEnabled": true
    },
    "maximumDurationInSeconds": 28800
}
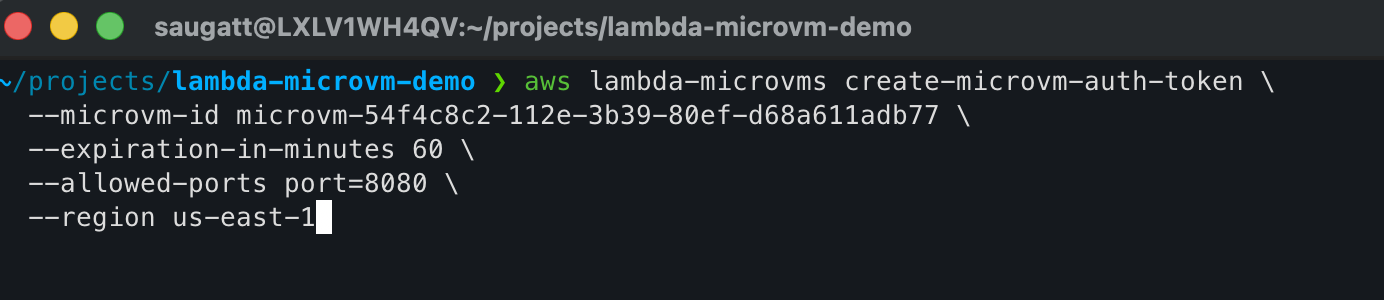
Step 6: Generate an Auth Token
aws lambda-microvms create-microvm-auth-token \
  --microvm-id <microvm-id> \
  --expiration-in-minutes 60 \
  --allowed-ports port=8080 \
  --region us-east-1
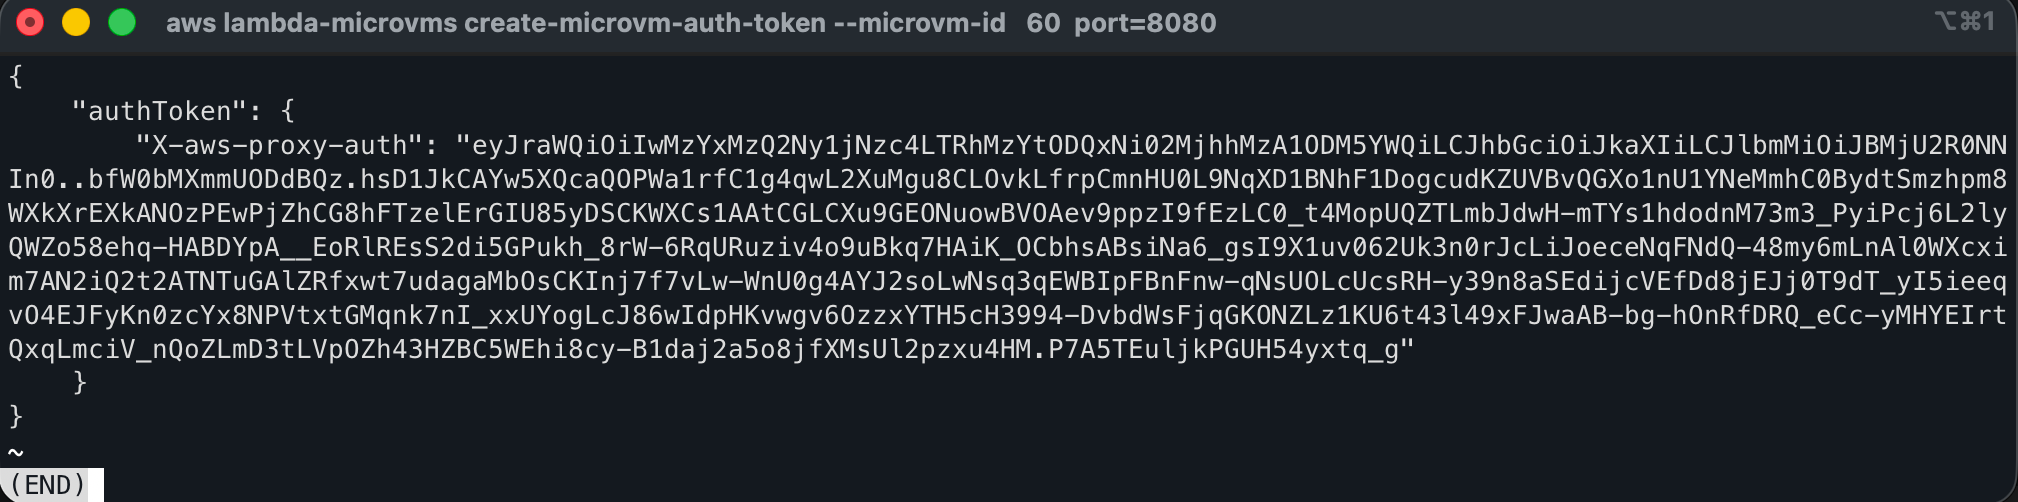
This returns:
{
    "authToken": {
        "X-aws-proxy-auth": "eyJraWQiOi..."
    }
}
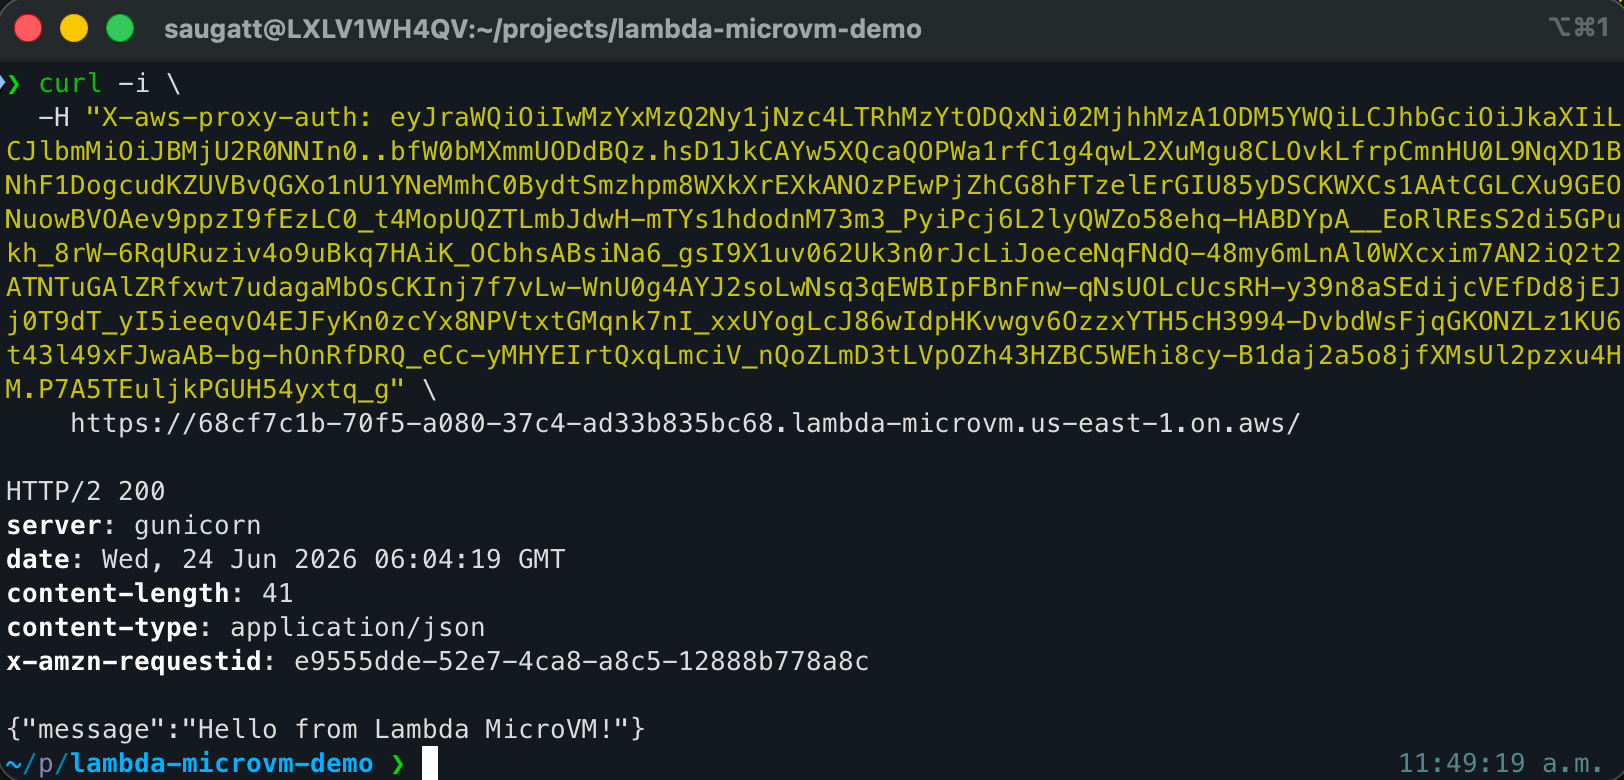
Step 7: Hit the Endpoint
curl -i \
  -H "X-aws-proxy-auth: <token>" \
  https://<endpoint>/
Successful response:
HTTP/2 200
server: gunicorn
content-type: application/json
x-amzn-requestid: e9555dde-52e7-4ca8-a8c5-12888b778a8c

{"message":"Hello from Lambda MicroVM!"}
Your Flask app is now running inside a fully isolated Firecracker MicroVM, served over HTTPS with a dedicated endpoint. Because it resumed from a snapshot, the app was already running the moment the MicroVM launched, no cold start in the traditional sense.
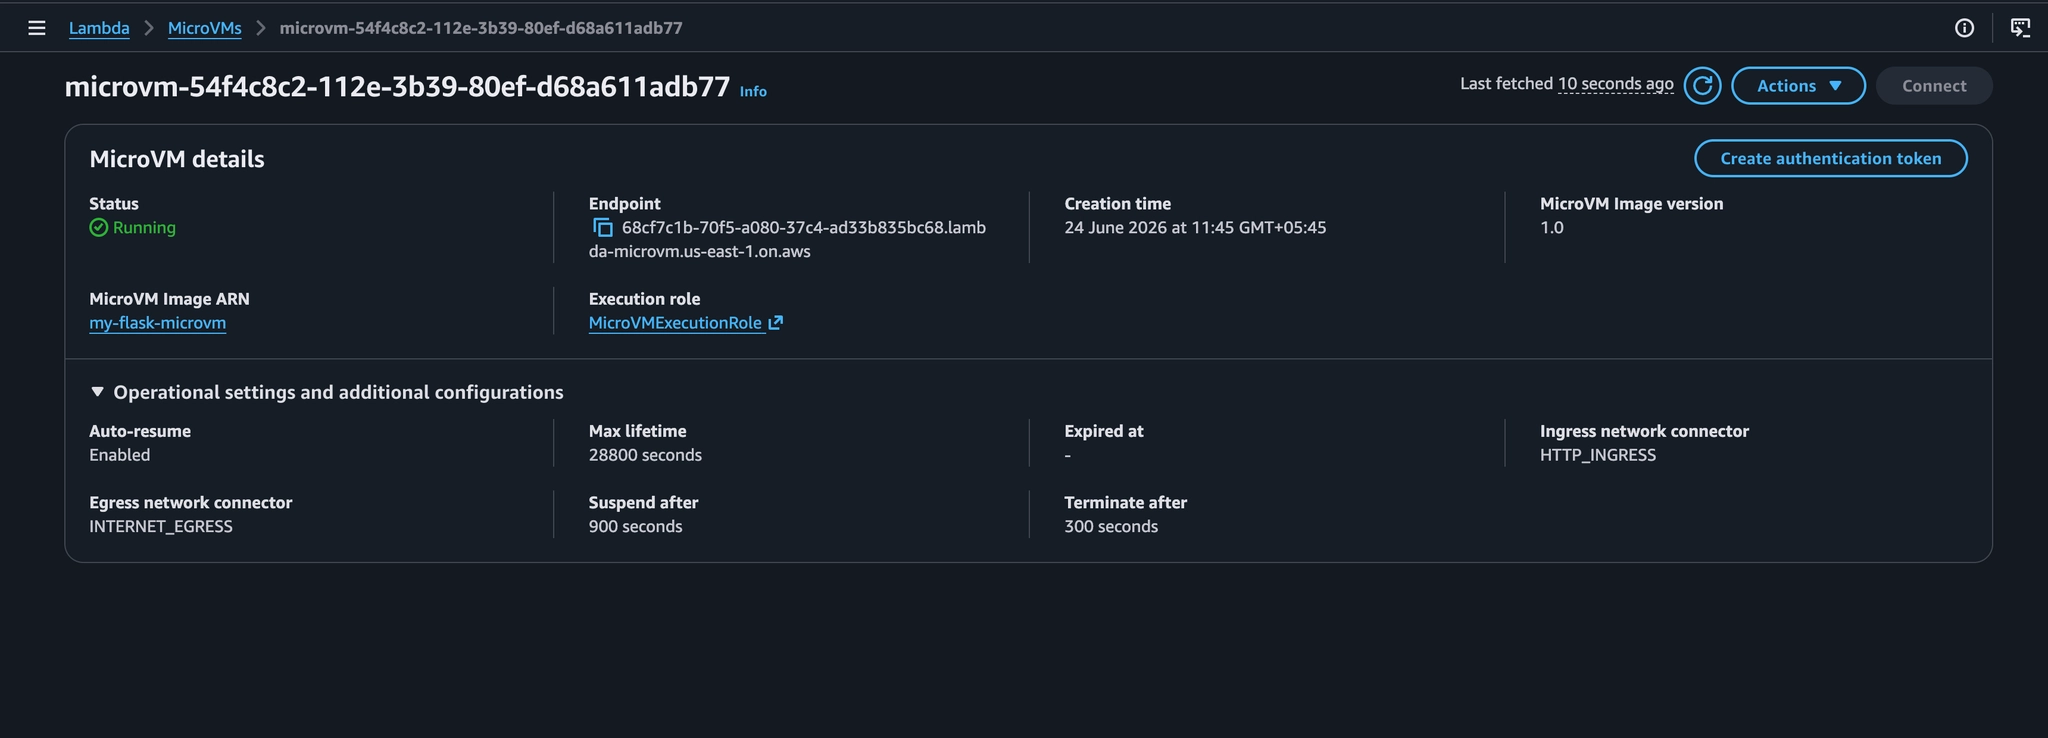
Here is the console view:
MicroVM Images:
MicroVM:
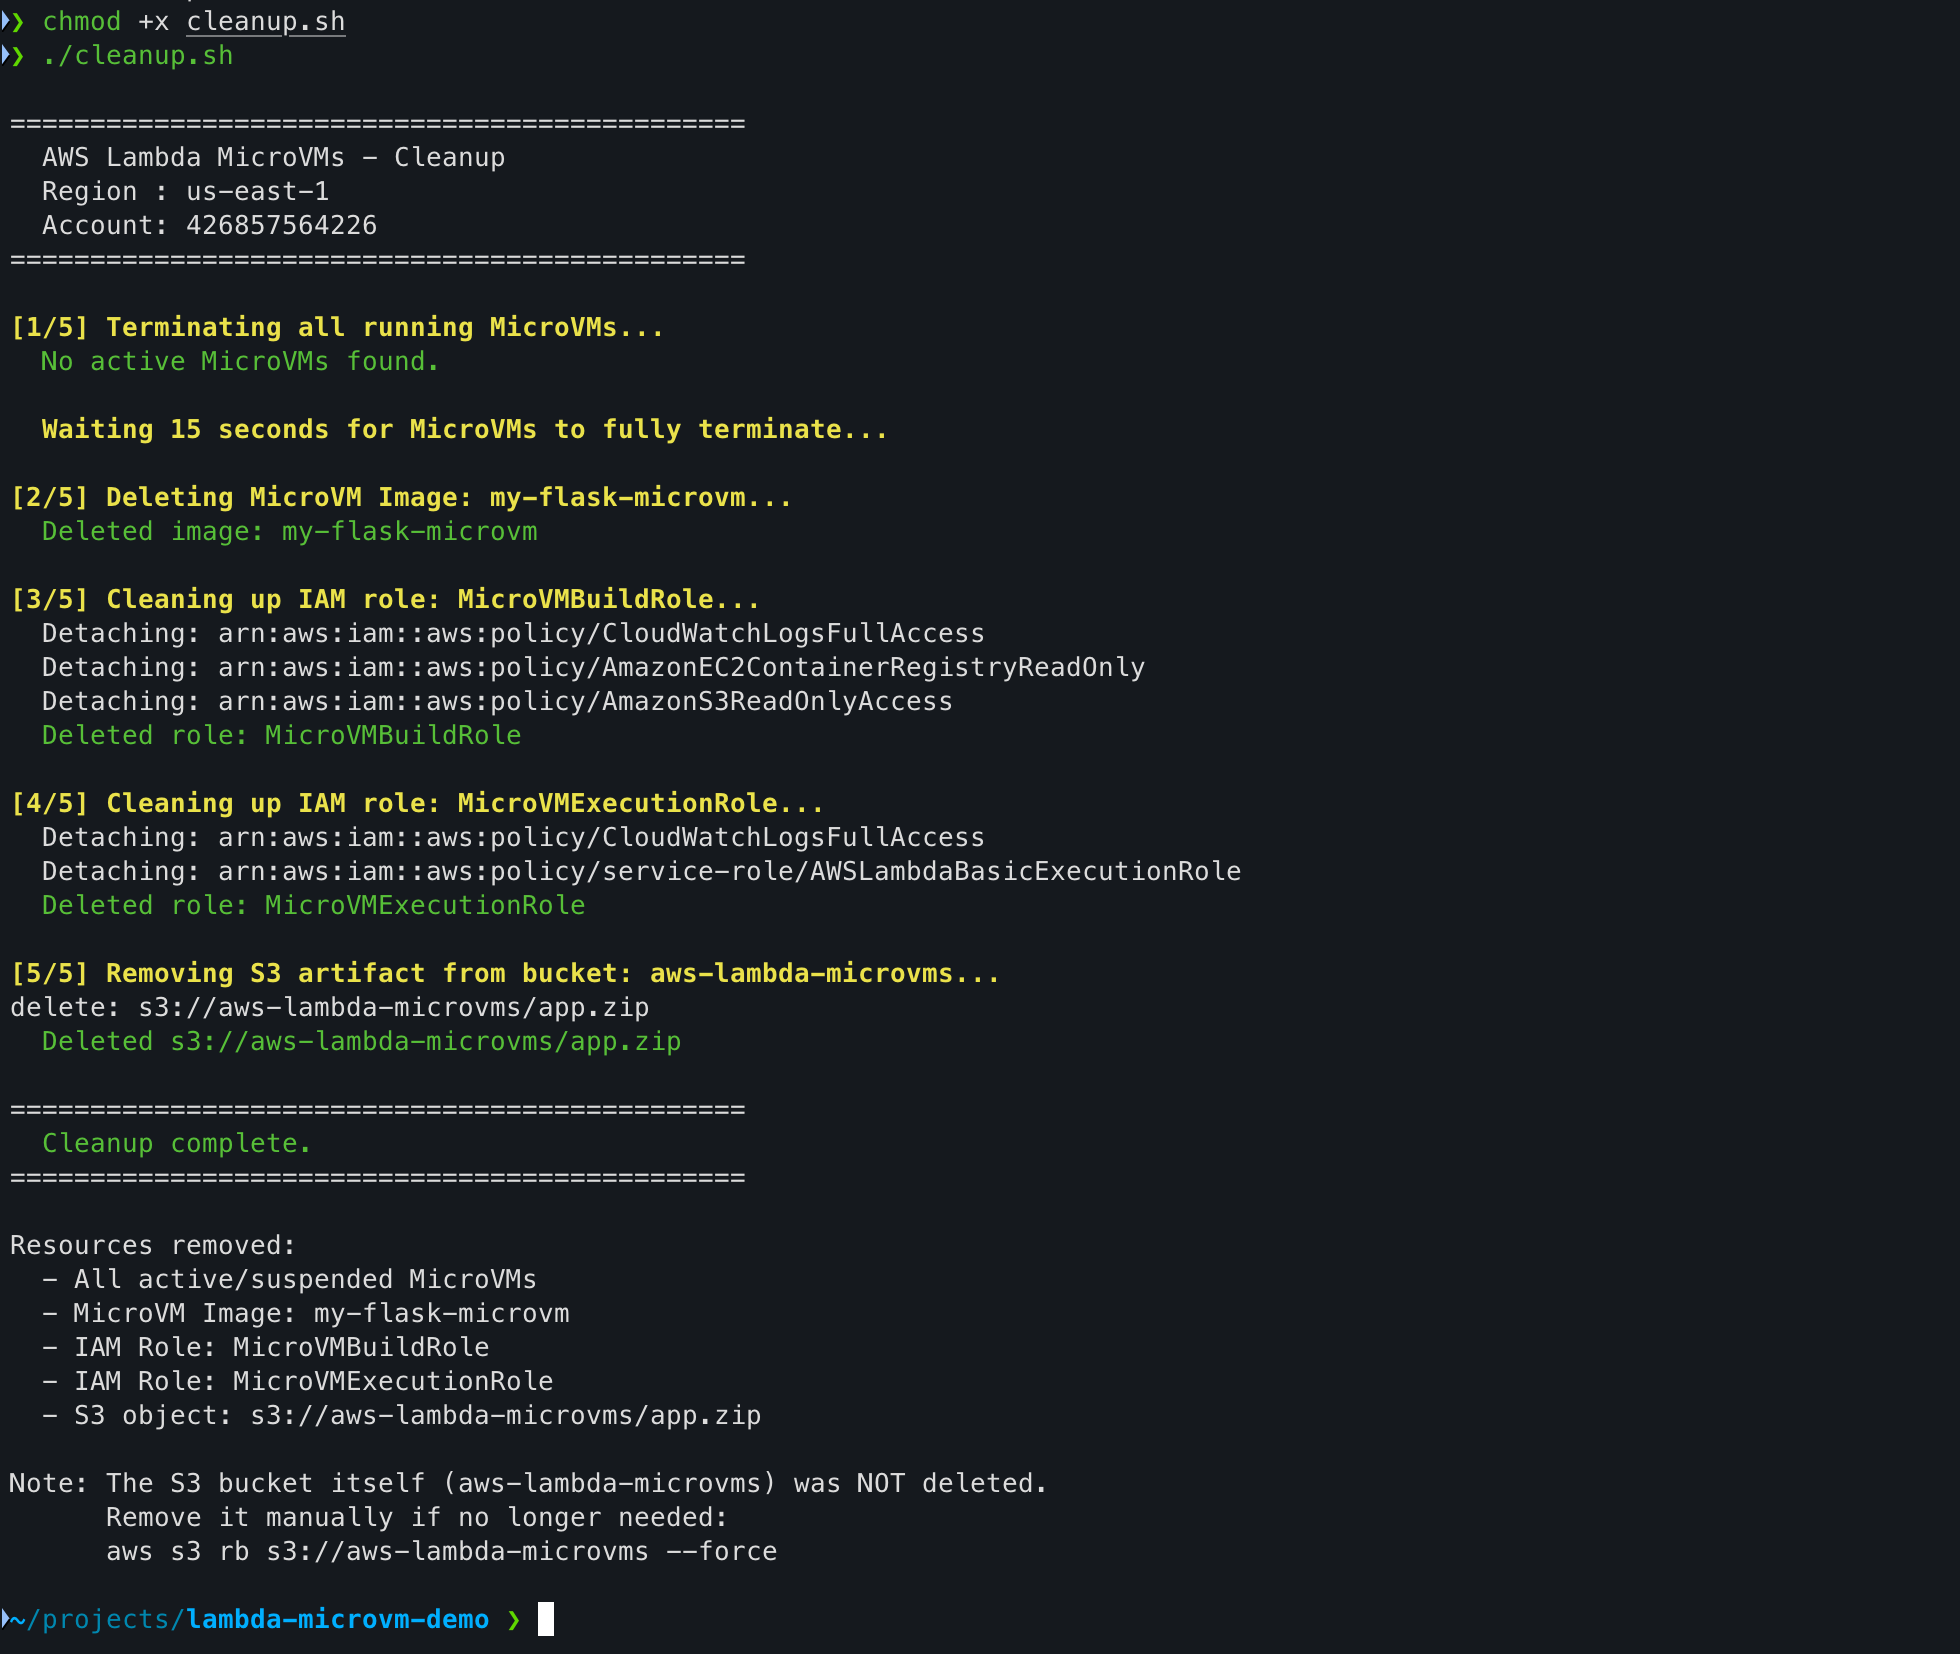
Cleaning Up:
After you have tested the MicroVM, make sure to clean up: these resources will cost you money if left running. I put together a full cleanup script here: https://gist.github.com/saugat86/5f62ab60bb5490c41fa24844171c595f
Here is what it does across 5 steps:
Step 1: Lists all MicroVMs in RUNNING, SUSPENDED, or STARTING state and terminates each one, then waits 15 seconds for full termination before touching the image.
Step 2: Deletes the my-flask-microvm MicroVM image. Skips gracefully if already gone.
Step 3 & 4: Detaches all attached policies from both IAM roles first (required before deletion), then deletes MicroVMBuildRole and MicroVMExecutionRole.
Step 5: Removes the app.zip artifact from S3. Leaves the bucket itself intact with a note on how to delete it manually if needed.
To run it:
chmod +x cleanup.sh
./cleanup.sh
The script is safe to run multiple times: every step checks if the resource exists before trying to delete it, so it will not error out on things already cleaned up.
Lessons Learned
This service launched on June 22, 2026. The documentation is still catching up. Here is everything I ran into during hands-on testing that is not written down anywhere yet:
| Issue | What Happened | Fix |
|---|---|---|
| Invalid trust policy principal | microvms.lambda.amazonaws.com does not exist | Use only lambda.amazonaws.com |
Access to port denied | Token generated for wrong port | Generate token with port=8080 to match Gunicorn |
| Port 80 and 5000 not reachable | Proxy only forwards to port 8080 | Always bind your app to port 8080 |
endpointUrl returns null | Field is named endpoint not endpointUrl | Use --query 'endpoint' or read the full JSON |
stop-microvm not found | Command does not exist | Use terminate-microvm instead |
--allowed-ports 8080 fails | Wrong format | Use --allowed-ports port=8080 |
| Cannot delete image while MicroVM is running | Delete is blocked until MicroVM is terminated | Run terminate-microvm first, then delete the image |
Build role shows - in console | Role was not created due to earlier failure | Always verify with aws iam get-role before creating the image |
Key Use Cases
Lambda MicroVMs is purpose-built for applications where each user or session needs its own dedicated execution environment:
- AI coding assistants: Give each user a persistent, isolated environment to run AI-generated code safely without any risk of cross-contamination between sessions.
- Interactive coding platforms: Notebook-style environments where users expect state to persist across multiple interactions during a session.
- Data analytics platforms: Long-running analytical sessions that need hours of state retention, including loaded datasets and computed results.
- Vulnerability scanners: Isolated environments to execute and analyse potentially malicious code without risk to other environments or the underlying system.
- Game servers with user scripts: Run user-supplied scripts at scale with genuine per-user isolation.
Pricing
You pay for baseline compute resources while your MicroVM is running. When your workload exceeds the baseline, you pay only for the active duration of additional resources consumed. Idle MicroVMs can be suspended either explicitly via API or automatically through a lifecycle policy which reduces running cost while preserving full state for fast resume. Full pricing details are on the AWS Lambda pricing page.
Availability
Lambda MicroVMs is available today in:
| Region | Code |
|---|---|
| US East (N. Virginia) | us-east-1 |
| US East (Ohio) | us-east-2 |
| US West (Oregon) | us-west-2 |
| Europe (Ireland) | eu-west-1 |
| Asia Pacific (Tokyo) | ap-northeast-1 |
Conclusion
Lambda MicroVMs closes a real gap that has existed in the serverless ecosystem for a while. You no longer have to choose between isolation, startup speed, and state retention or invest engineering time building your own virtualization layer to get all three.
The fact that it is built on Firecracker: the same tech running at massive scale inside Lambda for years which gives it operational credibility that matters in production. And for teams building AI-powered platforms, interactive coding environments, or any product where untrusted code execution is a core part of the experience, this is worth evaluating now.
Since the service launched just two days ago, expect the documentation and CLI experience to improve quickly. The lessons learned table in this post should smooth out the setup for anyone trying this today without the trial and error.
Get started at the AWS Lambda console or read the Lambda MicroVMs Developer Guide.
Stay tuned for more. Let’s connect on LinkedIn and explore my GitHub for future insights.